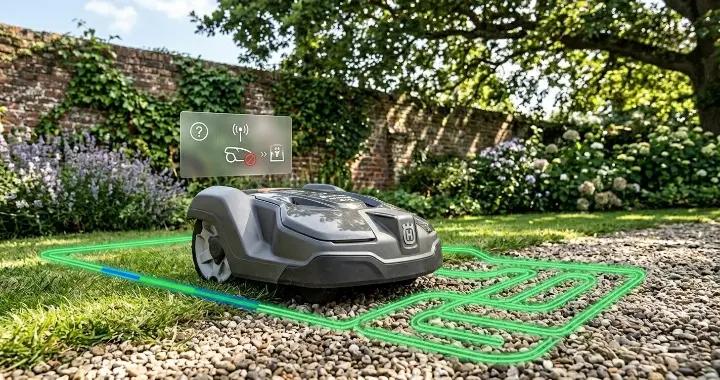
If your Husqvarna Automower is not returning to the charging station, you are not alone. Many owners run into problems where the mower circles around the base, stops nearby without docking, or runs out of battery before getting home.
In some cases, the mower follows the guide wire correctly but still misses the charging station. Other times, it may back away after docking or show errors like “Empty Battery” or “Charging Station Blocked.”
The good news is that most docking problems are caused by a small number of common issues. These can include a damaged guide wire, weak charging station signal, dirty charging contacts, incorrect return settings, or even firmware problems after an update.
This guide walks through the most common causes step by step. You will learn how the Automower finds its way home, how to test the guide wire and charging station, and which problems are most likely based on the mower’s behavior.
Instead of randomly replacing expensive parts, you can use these checks to narrow down the real cause and get your Automower docking normally again.
Quick Symptom Checker (Start Here First)
Before taking the mower apart or replacing parts, it helps to look at the exact behavior first. Many Husqvarna Automower docking problems can be narrowed down quickly based on what the mower is doing near the charging station.
Use the table below to match your symptom with the most likely cause.
Symptom
Most Likely Cause
Mower circles around the charging station
Weak charging station signal or damaged antenna wire
Mower reaches the station but reverses away
Dirty charging contacts or faulty charging loom
Mower stops with an “Empty Battery” error before docking
Broken guide wire, weak battery, or incorrect return settings
Mower follows the guide wire but misses the base
Guide wire calibration problem or docking signal issue
Mower worked fine before a firmware update or service
Software bug or calibration issue
“Charging Station Blocked” message appears
Charging signal problem or damaged charging station wiring
Mower takes a very long time to return home
Guide delay settings too high or guide wire routing problem
Mower docks briefly and then leaves again
Weak charging current or failing power supply
Mower cannot find the guide wire consistently
Damaged guide wire or loose wire connector
In many cases, the mower is actually giving useful clues through its behavior. For example, a mower that circles around the base usually has a different problem from one that docks correctly but refuses to charge.
The next sections will go through each major system step by step, starting with the charging station and guide wire.
How the Automower Finds the Charging Station
To diagnose docking problems correctly, it helps to understand how the Husqvarna Automower normally finds its way back to the charging station.
Most Automower models use three different methods to return home:
- Guide wire
- Boundary wire
- Charging station signal
The mower will switch between these methods depending on its settings and location in the yard.
Guide Wire
The guide wire is usually the main way the mower returns to the charging station. It is designed to give the mower a fast and direct path home.
In a properly installed setup, the guide wire runs through the center of the lawn so the mower can find it quickly from most areas of the yard.
When the guide wire is damaged, disconnected, or weak, the mower may:
- Wander around searching
- Run out of battery before docking
- Ignore the shortest route home
- Fail to reach the charging station consistently
Many “Empty Battery” errors are actually caused by guide wire problems.
Boundary Wire
The boundary wire acts as a backup navigation method if the mower cannot find the guide wire.
Instead of taking a direct route, the mower follows the perimeter wire until it eventually reaches the charging station. This method is usually slower and less efficient, especially in large or narrow lawns.
If the mower relies too heavily on the boundary wire, you may notice:
- Very slow return times
- Battery draining before docking
- Long loops around the edge of the lawn
In some installations, the mower may even travel the wrong direction around the boundary wire before reaching the base.
Charging Station Signal
The charging station also sends out a short-range signal that helps the mower align itself correctly for docking.
This signal is most important when the mower gets close to the base station. It helps guide the mower into the charging contacts.
When the charging station signal is weak or damaged, the mower may:
- Circle around the charging station
- Miss the dock repeatedly
- Back away after approaching
- Show “Charging Station Blocked” errors
Problems with the charging station antenna or wiring are common causes of this behavior.
Understanding which navigation method is failing makes troubleshooting much easier. In the next section, we will start with the simplest checks first before moving on to more advanced problems.
Step-by-Step Diagnosis Process
If your Husqvarna Automower is not returning to the charging station correctly, it is best to troubleshoot the problem one step at a time. Many owners replace expensive parts too early when the real issue is something simple like dirty charging contacts or incorrect settings.
Start with the easiest checks first before moving on to more advanced problems.
Step 1 — Check the Charging Station LED
Start by looking at the LED light on the charging station.
The light color can quickly tell you if there is a loop signal problem.
Common LED behaviors include:
- Solid green — system working normally
- Flashing blue — broken boundary wire or guide wire
- No light — no power to the charging station
If the LED is flashing blue, inspect the boundary wire and guide wire connections first before replacing any parts.
Also check:
- Power supply connections
- Loose terminals
- Damaged wire insulation
- Corrosion around connectors
A weak or unstable signal can prevent the mower from finding the base correctly.
Step 2 — Clean the Charging Contacts
Dirty or oxidized charging contacts are one of the most common causes of docking problems.
If the mower reaches the station but:
- Backs away
- Leaves again after docking
- Charges intermittently
- Fails to detect charging current
the contacts may not be making a proper connection.
Inspect both:
- The charging plates on the mower
- The metal contacts on the charging station
Clean them gently using:
- Fine sandpaper
- Electrical contact cleaner
- A dry cloth
Avoid using excessive water or harsh chemicals.
Step 3 — Test the Guide Wire
The guide wire is often the main reason an Automower cannot return home properly.
A damaged guide wire may still work sometimes, which makes the problem difficult to identify.
Signs of guide wire problems include:
- “Empty Battery” errors
- Slow return times
- Random wandering
- Failure to follow the shortest path home
One common test is to temporarily move the guide wire connection to one of the boundary wire terminals on the charging station.
On many Husqvarna G3 models, a flashing blue light after this test usually indicates a broken guide wire.
Also inspect for:
- Cuts from garden tools
- Loose connectors
- Water damage
- Rodent damage underground
Even a small break can weaken the signal enough to confuse the mower.
Step 4 — Reduce the Guide Delay to 0 Minutes
Incorrect return settings can make the mower search inefficiently for the charging station.
Many Automower models are set to wait several minutes before actively following the guide wire. During that time, the mower may wander randomly while the battery continues to drain.
Check these settings:
Menu → Installation → Find Charging Station
For many lawns, these settings work better:
- Guide delay: 0 min
- Boundary wire delay: 4–6 min
- Charging station signal: Max
This allows the mower to immediately start searching for the guide wire instead of wasting battery power.
Step 5 — Inspect the Charging Station Signal and Antenna
If the mower circles around the charging station or misses the dock repeatedly, the charging station signal may be weak.
Some users describe this behavior as the mower “hovering” around the base without properly docking.
Possible causes include:
- Damaged antenna wire
- Faulty charging station loom
- Loose internal connections
- Water damage inside the station
On many Husqvarna models, the antenna wire is located underneath the charging station.
Look for:
- Broken wires
- Melted connectors
- Corrosion
- Pinched cables
A damaged antenna can prevent the mower from aligning correctly with the docking station.
Step 6 — Check for Boundary Wire Interference
The placement of the boundary wire near the charging station can sometimes confuse the mower.
If the boundary wire runs directly underneath the charging station, the mower may receive conflicting signals.
The mower may behave like this:
- Approaches the station
- Stops suddenly
- Turns away
- Repeats the same movement
This happens because the boundary wire tells the mower to avoid the area while the charging station signal tells it to dock.
Re-routing the boundary wire slightly away from the charging station can sometimes solve the problem.
Step 7 — Recalibrate the Guide Wire
Some docking problems appear after:
- Firmware updates
- Dealer servicing
- Replacing parts
- Resetting settings
In these cases, the guide wire calibration may no longer be correct.
Symptoms can include:
- Strange reversing movements
- Missing the docking plate
- Repeated alignment attempts
- Driving away at the last second
Some recalibration procedures can be done through the mower menu, while others may require dealer diagnostic tools.
Step 8 — Consider Firmware or Battery Problems
If everything else checks out, the problem may be related to firmware or battery performance.
Several Automower owners report docking problems appearing after software updates.
Common symptoms include:
- Worked perfectly before update
- Increased searching time
- Sudden “Empty Battery” errors
- Failure to charge to 100%
- Mower stopping before reaching the base
A weak battery can also reduce the mower’s ability to return home, especially on large lawns or complex guide wire layouts.
If the battery no longer holds a full charge, the mower may simply run out of power before it can complete the return process.
Why the Mower Reaches the Station but Will Not Dock
One of the most frustrating Automower problems is when the mower successfully finds the charging station but still fails to dock correctly.
In many cases, the mower follows the guide wire normally, approaches the base, and then suddenly:
- Reverses away
- Stops in front of the station
- Circles around the dock
- Tries multiple times without charging
- Leaves the station again after docking
This usually means the navigation system is working, but the mower cannot complete the final docking process.
Dirty or Worn Charging Contacts
The most common cause is poor contact between the mower and the charging station.
Over time, the metal charging plates can develop:
- Dirt buildup
- Grass residue
- Oxidation
- Corrosion
Even a small amount of resistance can prevent the mower from detecting charging current properly.
Clean both contact surfaces carefully using:
- Fine sandpaper
- Electrical contact cleaner
- A dry microfiber cloth
If the contacts are badly worn or damaged, replacing the charging contact kit may solve the issue.
Faulty Charging Station Loom or Wiring
Some owners discover that the mower docks physically but still does not detect charging power.
In these cases, the problem may be inside the charging station wiring harness, sometimes called the charging loom.
Possible signs include:
- Melted connectors
- Burn marks
- Intermittent charging
- “Charging Station Blocked” errors
- Mower docking briefly and then backing away
Heat and moisture can slowly damage the internal connectors over time.
Inspect the wiring underneath the charging station if possible. Loose or damaged connectors are more common than many owners realize.
Weak Charging Station Signal
The charging station uses a short-range signal to guide the mower into the correct docking position.
If this signal becomes weak, the mower may appear confused near the base station.
Common symptoms include:
- Hovering near the dock
- Repeated docking attempts
- Turning left and right near the station
- Missing the charging contacts completely
A damaged antenna wire or internal station fault can weaken the signal enough to prevent proper alignment.
Boundary Wire Placement Problems
In some installations, the boundary wire is routed too close to or underneath the charging station.
This can create conflicting instructions for the mower.
The boundary wire tells the mower:
“Do not cross here.”
At the same time, the charging station signal tells it:
“Dock here.”
The result can look very strange. The mower may approach correctly, hesitate, reverse away, or repeat the same movement over and over.
Adjusting the wire layout near the charging station can sometimes fix this behavior immediately.
Calibration or Firmware Problems
If the problem started shortly after:
- A firmware update
- Dealer service
- Replacing the charging station
- Installing a new battery
the mower may need recalibration.
Some users report strange docking movements after updates, including repeated reversing, “bum shuffling,” or approaching the station at incorrect angles.
In these situations, resetting the charging station settings or recalibrating the guide wire may help.
Low Charging Current or Weak Power Supply
A weak transformer or failing power supply can also create docking problems.
Sometimes the mower docks successfully but leaves again because it does not detect enough charging current.
Possible signs include:
- Charging starts and stops randomly
- Battery percentage never reaches 100%
- Mower leaves the station too early
- Frequent “Empty Battery” errors
If all wiring and contacts look normal, testing the power supply may be necessary.
Why the Automower Gets an “Empty Battery” Error Before Reaching the Base
An “Empty Battery” error does not always mean the battery itself is bad.
In many cases, the mower still has enough power to reach the charging station, but something prevents it from finding the fastest route home.
The result is a mower that keeps searching until the battery finally runs flat somewhere in the yard.
Broken or Weak Guide Wire
A damaged guide wire is one of the most common causes of Empty Battery errors.
The guide wire is supposed to give the mower a direct path back to the charging station. If the signal becomes weak or interrupted, the mower may wander randomly instead of heading home efficiently.
Common causes include:
- Partial wire breaks
- Loose connectors
- Corrosion
- Rodent damage
- Cuts from aerators or garden tools
Sometimes the guide wire still works part of the time, which makes the issue difficult to diagnose.
Typical symptoms include:
- Mower occasionally returning normally
- Random failures on larger lawns
- Very slow return times
- Mower ignoring the guide wire completely
Guide Delay Settings Are Too High
Some Automower models wait several minutes before actively searching for the guide wire.
During this delay period, the mower performs random searching while battery power continues to drop.
On large or narrow lawns, this can waste a surprising amount of battery life.
Many owners improve docking reliability by changing the settings to:
- Guide delay: 0 min
- Boundary delay: 4–6 min
This allows the mower to immediately start following the guide wire instead of wandering first.
The Mower Is Following the Boundary Wire Instead
If the guide wire fails, the mower may switch to the boundary wire as a backup route.
This often works, but it is much slower.
On complex lawns, the mower may travel a very long distance around the perimeter before finally reaching the charging station.
Possible signs include:
- Mower hugging the lawn edge
- Long return times
- Battery draining during the return trip
- Mower taking the “wrong” direction home
Large lawns and narrow passages make this problem even worse.
Weak or Aging Battery
A battery can slowly lose capacity over time, even if the mower still appears to operate normally during mowing.
An aging battery may:
- Drain faster during return trips
- Struggle on hills
- Lose voltage suddenly near empty
- Fail before reaching the charging station
Some users notice that the mower cuts grass normally but starts failing to return home more often.
If the mower is several years old or has many charging cycles, battery wear becomes more likely.
Firmware or Calibration Problems
Several Automower owners report Empty Battery errors appearing after:
- Firmware updates
- Dealer servicing
- Battery replacement
- Charging station replacement
In some cases, the mower may search inefficiently, ignore the guide wire, or repeatedly miss the docking station even though the installation has not changed.
If the issue started suddenly after an update or repair, recalibration or software troubleshooting may be necessary.
Charging Station Signal Problems
The mower may also waste battery power if it cannot properly detect the charging station signal near the base.
This can cause behavior such as:
- Circling around the station
- Repeated docking attempts
- Approaching but not docking
- Stopping near the station
Even though the mower technically “found” the charging station area, it may continue searching until the battery becomes critically low.
Lawn Layout Can Also Affect Return Performance
Large lawns, narrow corridors, steep slopes, and complex guide wire layouts can increase return time significantly.
If the guide wire is poorly positioned, the mower may struggle to find an efficient route home before the battery runs out.
This is especially common when:
- The guide wire is too close to the boundary wire
- Sharp corners slow the mower down
- The charging station is placed in a difficult location
- Long narrow passages separate lawn zones
Improving the guide wire routing can sometimes solve recurring Empty Battery problems without replacing any parts.
Recommended Replacement Parts and Accessories
If your Husqvarna Automower is having repeated docking or “Empty Battery” issues, sometimes cleaning and adjustment is not enough. Certain wear parts can slowly degrade over time and cause unstable charging or navigation problems.
Below are the most common replacement parts and accessories that can help restore normal docking performance.
Charging Contacts Kit
The charging contacts are one of the most frequently worn parts on an Automower.
Over time, they can become:
- Pitted or uneven
- Oxidized
- Weak in electrical connection
- Damaged from repeated docking
If your mower docks but does not charge properly, or it backs away after touching the station, replacing the charging contacts is often an effective fix.
Charging Station Loom / Internal Wiring Harness
Inside the charging station, there is a wiring assembly that carries power and signal. This is often called the charging loom.
This part can fail due to:
- Heat damage
- Moisture exposure
- Loose connectors
- Long-term wear
Signs of a faulty loom include:
- Intermittent charging
- “Charging Station Blocked” errors
- Mower docking but immediately leaving
- Visible melting or discoloration on connectors
Replacing this part can solve problems that look like “random” docking failures.
Guide Wire Repair Kit
A broken or weak guide wire is one of the top causes of return-to-base failures.
A repair kit typically includes:
- Wire connectors
- Waterproof gel-filled connectors
- Extension wire segments
This is useful when:
- The mower randomly loses the guide signal
- “Empty Battery” errors appear before docking
- The mower takes inefficient return paths
Even small underground breaks can disrupt navigation.
Boundary Wire Connectors and Splices
Boundary wire issues are often caused by poor connections rather than full wire breaks.
Over time, connectors can:
- Corrode
- Loosen
- Lose conductivity due to moisture
Replacing connectors or re-splicing weak points can significantly improve system stability.
This is especially important if your mower sometimes works perfectly but fails on other days.
Charging Station Power Supply
A weak or unstable transformer can lead to inconsistent charging behavior.
Common symptoms include:
- Mower docks but does not stay charging
- Battery percentage never reaches 100%
- Random stopping and restarting at the base
- Intermittent power loss to the station
If all wiring and contacts look fine, the power supply should be tested or replaced.
Guide Wire Installation Accessories
For more stable performance, additional accessories can improve signal reliability:
- Wire stakes for better ground stability
- Protective tubing for exposed wire sections
- Cable routing clips near the charging station
These help reduce accidental damage and improve long-term system stability.
When You Should Replace Parts Instead of Repairing
In general, consider replacement instead of repair when:
- The same issue keeps coming back after fixing
- Multiple parts show wear or corrosion
- The mower behavior is inconsistent even after troubleshooting
- The system is more than 3–5 years old and heavily used
Replacing key components can often save time compared to repeated troubleshooting, especially when dealing with intermittent docking issues.
How to Prevent Future Docking Problems
Once your Automower is working normally again, the goal is to keep it stable over time. Most docking problems do not happen suddenly. They usually develop slowly due to wire damage, dirty contacts, or weak connections.
With a few simple habits, you can reduce the chance of future return-to-base failures.
Keep Charging Contacts Clean
Dirty charging contacts are one of the easiest problems to prevent.
Grass, dust, and oxidation can slowly build up over time and reduce charging efficiency.
To prevent this:
- Wipe the charging plates every 1–2 weeks
- Remove grass clippings after mowing sessions
- Use a dry cloth or light contact cleaner if needed
Clean contacts help the mower charge faster and dock more reliably.
Inspect the Guide Wire Regularly
The guide wire is critical for fast and efficient return trips.
Even small damage can cause major navigation problems.
Check the wire periodically for:
- Exposed sections
- Loose connectors
- Signs of digging or garden tool damage
- Animal or insect damage underground
If your mower starts taking longer to return home, the guide wire should be the first thing you inspect.
Avoid Tight or Coiled Power Cables
A common but overlooked issue is the way the charging station power cable is arranged.
If the cable is tightly coiled or bundled, it can sometimes create interference or instability.
To prevent this:
- Keep the power cable loosely arranged
- Avoid tight loops near the transformer
- Ensure the cable is not under tension
A clean and relaxed cable layout helps maintain stable charging behavior.
Place the Charging Station in an Open Area
Charging station placement has a big impact on docking reliability.
Avoid placing it:
- Too close to fences or walls
- In narrow corners
- Near metal objects or structures
- In areas with uneven ground
The best location is open, flat, and centrally accessible from multiple directions.
This gives the mower a clear approach path and reduces docking errors.
Keep Firmware Updated Carefully
Firmware updates can improve performance, but in some cases they may also change navigation behavior.
To stay safe:
- Only update when necessary
- Read update notes if available
- Observe the mower after updates for new behavior changes
If problems appear immediately after an update, recalibration may be needed.
Protect the Wire From Garden Work
Many docking problems are caused by accidental wire damage during routine yard work.
To prevent this:
- Mark wire routes if you aerate or dig the lawn
- Avoid edging tools near boundary lines
- Use protective tubing in high-risk areas
Physical damage is one of the most common long-term failure points.
Run Periodic System Checks
Every few weeks, do a quick check of the system:
- Look at charging station LED status
- Watch a full return-to-base cycle
- Check for unusual movements near the dock
- Ensure charging percentage reaches 100%
Catching small issues early prevents bigger failures later.
Summary
Most docking problems can be avoided with regular maintenance and simple preventive habits. A clean charging system, intact guide wire, and stable power setup will keep your Automower returning to base reliably throughout the season.
FAQ – Husqvarna Automower Not Returning to Base
Why is my Husqvarna Automower circling the charging station?
This usually means the mower can detect the charging station signal but cannot complete the final docking step. Common causes include weak charging station antenna signal, dirty charging contacts, or a misaligned docking position. In some cases, the mower is also confused by boundary wire interference near the base.
Why does my Automower reverse away from the charging station?
If the mower approaches the station but then backs away, it often means it cannot detect proper charging contact or charging current. Dirty or worn charging plates, a faulty charging loom, or poor alignment between mower and station are the most common reasons.
What does “Empty Battery” mean on a Husqvarna Automower?
An “Empty Battery” error means the mower ran out of power before it could return to the charging station. This is usually caused by slow return navigation, a weak guide wire signal, inefficient routing via the boundary wire, or a degraded battery that drains too quickly.
Can a broken guide wire stop the mower from returning home?
Yes. A damaged or disconnected guide wire is one of the most common causes of return-to-base failure. The mower may still operate normally for mowing but will struggle to find the fastest route back to the charging station, often leading to long return times or battery depletion.
Why does my Automower follow the guide wire but still miss the station?
This usually points to a calibration or docking alignment issue. The mower may correctly follow the guide wire but fail in the final positioning phase. Weak charging station signal, antenna problems, or firmware-related navigation errors can all cause this behavior.
Can firmware updates affect docking performance?
Yes. Some users report changes in docking behavior after firmware updates or servicing. The mower may behave differently due to updated navigation logic or recalibrated settings. If issues begin right after an update, recalibration or resetting installation settings may help.
How do I fix a “Charging Station Blocked” error?
This error often appears when the mower detects an obstruction or inconsistent signal near the charging station. Common causes include dirty charging contacts, damaged station wiring, or interference from boundary wires placed too close to the dock area.
Should I replace the battery if the mower does not return to base?
Not immediately. Battery issues are only one possible cause. It is better to first check the guide wire, charging contacts, and charging station signal. A battery replacement should only be considered if the mower is several years old or shows clear signs of reduced runtime.
Final Thoughts
Most Husqvarna Automower docking problems look more complicated than they really are. In many cases, the mower is not “broken” in a major way. Instead, it is dealing with a small issue in navigation, signal, or charging contact that builds up over time.
The key is to avoid random part replacement and instead follow a clear step-by-step diagnosis. Start with simple checks like cleaning the charging contacts and checking the charging station LED. Then move on to guide wire testing and settings adjustments before considering more advanced issues like calibration or firmware behavior.
In real-world cases, problems such as circling around the station, reversing away from the dock, or getting an “Empty Battery” error are usually caused by just a few common factors: a weak guide wire signal, dirty or worn charging contacts, or issues around the charging station antenna or wiring.
If you work through the system logically, most issues can be identified and fixed without replacing the entire mower. And in cases where parts are worn, replacing key components like the charging contacts, guide wire sections, or charging loom is often enough to restore normal operation.
With regular maintenance and a structured troubleshooting approach, your Automower can return to the charging station reliably and keep your lawn running smoothly throughout the season.