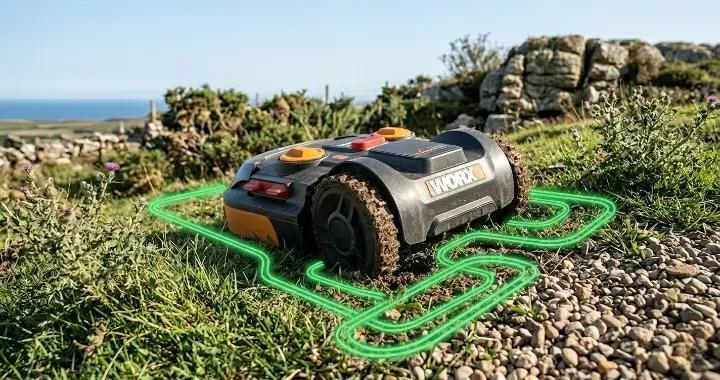
Installing the boundary wire is the most important part of setting up a Worx Landroid robot mower — and it’s also the step where most new owners make costly mistakes.
A poorly planned wire layout can lead to all kinds of frustrating problems later on, including the mower getting stuck in corners, missing sections of grass, struggling in narrow passages, randomly leaving the lawn area, or failing to return to the charging station. In many cases, the mower itself is not the problem at all — the boundary wire setup is.
One reason installation can feel confusing is that the official guidelines don’t always match real-world lawn conditions. For example, some owners follow the recommended 26 cm edge distance everywhere, while experienced users often reduce that spacing near hard edges to improve cutting coverage. Narrow corridors, gravel borders, sharp turns, slopes, and multi-zone lawns can also require adjustments that are not obvious during the first installation.
This guide is designed to help you avoid those beginner mistakes from the start. In addition to the official setup process, we’ll cover real-world layout tips from experienced Landroid owners, including how to handle tight spaces, when to use the Bertelsen triangle method, how to plan boundary wire islands correctly, and what to do if your mower behaves unpredictably after installation.
Whether you’re installing a new Worx Landroid WR155, Worx Landroid M500, or another Landroid model, the goal is the same: create a reliable wire layout that works well long-term — not just on the first day.
What You Need Before Installing the Boundary Wire
Before you start laying the boundary wire, it’s worth spending a little extra time preparing the installation properly. Many first-time Landroid owners rush into the setup process, only to discover later that they need to move sections of wire, reposition islands, or completely redesign narrow passages.
A good installation is not just about following the wire around the edge of the lawn. You also need to think about future adjustments, difficult corners, return paths to the charging station, and how the mower will behave in real-world conditions after weeks of mowing.
Having the right tools and planning the entire layout in advance can save hours of troubleshooting later.
Tools and Supplies
Most Worx Landroid WR155 and Worx Landroid M500 kits already include the basic installation materials, but experienced users often recommend keeping a few additional items ready before starting.
Here are the most useful supplies for a smooth installation:
- Boundary wire
- Plastic wire pegs/stakes
- Waterproof wire connectors
- Rubber mallet
- Measuring tape
- Extra repair wire
- Wire cutter/stripper
- Spare pegs for future adjustments
If your lawn has slopes, tree roots, gravel borders, or uneven ground, you will usually need more pegs than the standard kit provides. Loose wire is one of the most common causes of accidental wire cuts later in the season.
It’s also smart to keep a few waterproof connectors nearby from day one. Even careful installations often require small layout changes during the first few weeks.
Should You Use the Included Wire or Upgrade It?
For smaller and simpler lawns, the included boundary wire is usually good enough. However, larger yards and more complex layouts often benefit from thicker aftermarket wire.
Many long-term Landroid owners eventually upgrade because thin wire can become frustrating over time, especially if:
- the lawn has frequent edging work
- the ground shifts seasonally
- pets or wildlife disturb the wire
- the mower accidentally damages exposed sections
- multiple repairs weaken the original loop
Thicker wire is generally easier to detect later if repairs become necessary, and it often survives accidental garden tool contact better than very thin factory wire.
That said, there is no need to overcomplicate your first installation. A properly planned layout matters far more than buying expensive wire immediately.
Before You Start: Plan the Entire Lawn First
One of the biggest beginner mistakes is installing the wire section by section without planning the full layout first.
Before placing a single peg, walk the entire lawn and think about:
- where the charging station will sit
- narrow corridors between zones
- tree islands and flower beds
- gravel borders
- slopes and uneven terrain
- future landscaping changes
- areas where the mower could get trapped
This step becomes especially important for lawns with tight passages or multiple mowing areas. A setup that looks correct on paper may behave very differently once the mower begins navigating automatically.
Many experienced owners also recommend leaving small loops of extra wire in hidden areas during installation. These extra loops make future adjustments much easier without requiring complete wire replacement later.
Finally, avoid burying the wire immediately. Let the mower run for several mowing cycles first so you can test the layout and make adjustments before committing to a permanent installation.
How Worx Landroid Boundary Wire Actually Works
Before installing the wire, it helps to understand how the Landroid navigation system actually works in real-world use. Many setup mistakes happen because new owners assume the mower follows the wire like a train track or mows in perfect straight-line patterns.
In reality, the boundary wire mainly acts as an invisible signal loop that defines where the mower can and cannot travel. Once you understand how the signal behaves, many confusing installation rules suddenly make much more sense.
How the Loop Signal Works
The boundary wire creates a continuous low-voltage loop around your lawn. The charging station sends a signal through the wire, and the mower constantly detects that signal while operating.
The wire must always form a complete closed loop. If the loop breaks anywhere — even from a tiny damaged section underground — the mower may display errors such as:
- “Wire Missing”
- “No Loop Signal”
- boundary wire fault warnings
This is why waterproof connectors and solid wire connections are so important during installation and future repairs.
The mower does not physically touch the wire while mowing. Instead, it detects the electromagnetic signal around the wire and reacts before crossing the boundary. This allows the mower to stay within the lawn area without needing physical barriers.
One important thing many beginners misunderstand is overlapping wire behavior. In some situations, two wire sections can safely run closely together because the signals cancel each other out. This is commonly used when creating islands around trees or obstacles.
However, crossing the wires incorrectly can confuse the mower completely and cause navigation failures.
Clockwise vs Counterclockwise Layout
Another common source of confusion is wire direction.
With most Landroid installations, the boundary wire leaves the charging station and travels counterclockwise around the lawn before returning to the base station. Many official diagrams show this layout, but first-time owners often become confused when planning narrow passages or islands.
In practice, the important part is consistency and proper loop completion — not obsessing over the direction itself.
The charging station placement matters because the mower uses the boundary wire to guide itself home during charging cycles. Poor orientation near walls, slopes, or narrow exits can make docking less reliable over time.
Some experienced Landroid owners also intentionally leave extra wire loops near the charging station or difficult corners so they can make small adjustments later without replacing large sections of wire.
How the Robot Uses the Wire to Return Home
While mowing, the Landroid moves in relatively random patterns to gradually cover the lawn area. It does not mow in neat rows like a traditional ride-on mower.
However, when the battery becomes low, the mower switches behavior and actively searches for the boundary wire to guide itself back to the charging station.
This is where many installation problems begin to appear.
If the wire layout includes:
- extremely sharp turns
- tight corridors
- poor edge spacing
- loose wire sections
- awkward charging station placement
the mower may struggle to follow the wire smoothly back home.
Narrow passages are especially important because the mower often follows the wire at slightly different angles each time. A passage that looks wide enough on paper may still cause wheel slipping, repeated bumping, or failed docking attempts in real-world conditions.
Understanding this behavior early makes it much easier to design a boundary wire layout that works reliably long-term instead of constantly needing adjustments after installation.
Planning Your Boundary Wire Layout Before Installation
A successful Landroid installation starts long before you place the first peg in the ground. The wire layout is what determines how smoothly the mower navigates your lawn every day, especially when dealing with tight corners, narrow passages, slopes, or complicated landscaping.
Many new owners assume they can simply follow the perimeter of the lawn and everything will work automatically. In reality, even small layout decisions can affect mowing efficiency, docking reliability, and long-term maintenance.
Spending extra time planning the layout now can prevent weeks of frustration later.
Choosing the Best Charging Station Location
The charging station is the center of the entire boundary wire system, so its placement matters more than most beginners realize.
Ideally, the charging base should sit on:
- flat and stable ground
- an area with good drainage
- a section of lawn with clear wire access
- a location without tight immediate turns
Avoid placing the charging station:
- directly on slopes
- near sharp corners
- inside narrow corridors
- too close to obstacles or walls
Landroid mowers need enough straight wire leading into the charging station so they can align properly during docking. If the base sits too close to a corner or difficult transition area, the mower may repeatedly miss the charging contacts or struggle to follow the wire smoothly.
Shade can also help reduce long-term heat exposure, especially during summer. However, stable positioning and reliable wire routing are usually more important than perfect shade placement.
For complicated lawns, it often helps to sketch the entire layout on paper before installing anything permanently.
Planning Around Trees, Flower Beds, and Obstacles
Not every obstacle needs a boundary wire island around it.
In many cases, Landroid mowers can safely bump into solid objects like:
- mature trees
- fence posts
- patio furniture
- thick landscape edging
However, delicate areas should usually be protected with islands, including:
- flower beds
- ponds
- exposed roots
- gravel sections
- irrigation covers
- young trees
An island is created by routing the wire out to the obstacle and back along the exact same path. Because the signals cancel each other out when the wires are close together, the mower treats the isolated area as a protected zone.
One common beginner mistake is creating too many unnecessary islands. Overcomplicated layouts increase installation time and make future troubleshooting harder.
If the mower can safely touch an object without damage, a simple bump-and-turn approach is often easier and more reliable.
How to Handle Narrow Corridors Between Lawn Areas
Narrow passages are one of the most difficult parts of any Landroid installation.
This becomes especially common when the lawn has:
- side yards
- paved walkways
- gates
- separated mowing zones
- landscaping transitions
On paper, a corridor may appear wide enough, but real-world navigation can behave differently once the mower begins returning home along the wire.
For example, many owners discover that a 70 cm passage becomes surprisingly tight after accounting for:
- wire spacing
- edge clearance
- turning behavior
- gravel avoidance
- Bertelsen corner triangles
This is one reason experienced users sometimes adjust official spacing recommendations slightly in practical installations.
In some cases, a simple 90-degree turn works better than an aggressive triangle setup, especially if one side of the corridor uses safe hard pavement rather than gravel or flower beds.
Very narrow areas may also benefit from multi-zone configuration instead of forcing the mower through difficult transitions every cycle.
The key is understanding that the mower does not follow the wire with perfect precision every single time. Small variations in wheel angle and traction can create problems in passages that are technically “wide enough” according to the manual.
Planning for Slopes and Uneven Ground
Slopes add another layer of complexity to boundary wire planning.
Even if your Landroid model technically supports steep inclines, wire placement on slopes still matters. Tight turns, loose soil, or slippery grass can reduce traction and cause the mower to drift outside the intended mowing area.
When planning wire placement on slopes:
- avoid sharp turns near steep sections
- give the mower extra room near edges
- avoid placing the charging station on an incline
- secure the wire tightly with additional pegs
Uneven terrain can also create hidden problems over time. Small bumps, exposed roots, or sinking ground may eventually lift sections of wire high enough for the mower blades to strike.
This is why many experienced owners monitor the lawn for several weeks before burying the wire permanently. Initial adjustments are completely normal, especially during the first mowing season.
Recommended Boundary Wire Distances (Real-World Setup Tips)
One of the most confusing parts of installing a Landroid boundary wire is figuring out how far the wire should sit from the edge of the lawn.
Official Worx recommendations are designed to work safely for most yards, but real-world installations are rarely perfect. Experienced Landroid owners often make small adjustments depending on the type of edge, the mower model, wheel traction, and how much uncut grass they are willing to trim manually later.
This is why you’ll often see conflicting advice online. Some users follow the official spacing exactly, while others intentionally move the wire closer to hard edges to improve cutting coverage.
The important thing is understanding why different distances are used in different situations.
Distance From Hard Edges and Pavement
Hard edges are usually the easiest areas for a Landroid mower to handle.
Examples include:
- pavement
- patio stones
- concrete borders
- flush-level walkways
Because the wheels can partially drive over these surfaces safely, many owners place the boundary wire closer to the edge than the official recommendation.
In real-world setups, common distances are:
Edge Type
Common Distance
Flush hard edge
10–18 cm
Raised hard edge
20–26 cm
Many experienced users prefer around 18 cm because it reduces the amount of uncut grass left behind near sidewalks and paving stones.
However, there is a tradeoff.
Placing the wire too close to raised pavement or walls may cause:
- repeated bumping
- wheel slipping
- scraping
- failed turns in narrow areas
For beginners, starting slightly safer is usually better. You can always move the wire closer later after observing how the mower behaves during several mowing cycles.
Distance From Soft Edges and Flower Beds
Soft edges require more caution because the mower wheels can sink, slide, or drop outside the lawn area.
Examples include:
- mulch beds
- flower beds
- loose soil
- bark areas
- lawn edges without hard support
For these areas, the standard 26 cm spacing recommendation is usually much safer.
This extra distance helps prevent:
- wheel drop-offs
- digging during turns
- damaged flower beds
- unstable traction
- mower escape attempts
Trying to reduce spacing too aggressively near soft edges often creates more maintenance work later, especially after rain or seasonal soil movement.
If the mower repeatedly spins its wheels or leaves tracks near a soft edge, increasing the wire distance slightly usually improves reliability.
Distance From Gravel, Walls, and Pools
Some areas deserve even more clearance because mistakes can damage the mower itself.
Gravel is one of the biggest examples.
Small stones can potentially:
- reduce wheel traction
- cause wheel digging
- create navigation instability
- increase blade wear over time
Many Landroid owners intentionally keep 26–35 cm of distance near gravel borders, especially in narrow corridors or return-to-base routes.
Walls and fences also need careful spacing. Although the mower can bump into solid obstacles safely in many situations, repeated tight contact can reduce navigation efficiency and create awkward turning behavior.
Pools, retaining walls, steep drop-offs, and water features should always receive generous clearance. It’s better to trim a small strip manually than risk the mower leaving the safe mowing area.
Official Recommendations vs Real-World User Experience
One reason new owners become confused is that official instructions often prioritize safe universal installation rather than optimized cutting performance.
For example, the commonly recommended 26 cm spacing works reliably for most beginners, but many experienced users gradually reduce that distance near hard edges after testing their mower behavior.
A common real-world setup strategy looks something like this:
Area Type
Conservative Setup
Optimized Setup
Hard pavement edge
26 cm
10–18 cm
Soft flower bed
26 cm
26–30 cm
Gravel border
30 cm
26–35 cm
Wall or fence
26 cm
18–26 cm
This is also why experienced Landroid owners often recommend testing the mower for several days before burying the wire permanently.
Small layout adjustments are extremely common during the first season. Even lawns that look simple on paper may require fine-tuning once the mower begins navigating automatically in real-world conditions.
Step-by-Step: Installing the Boundary Wire
Once you’ve planned the layout carefully, it’s time to install the boundary wire itself. This is the stage where patience matters most. Rushing the installation usually leads to future adjustments, troubleshooting, or complete wire rerouting later.
The good news is that the process itself is fairly straightforward once the layout decisions are already made.
The goal is not to create a “perfect” installation immediately. Instead, focus on building a clean, testable wire loop that you can fine-tune after observing how the mower behaves during the first few mowing cycles.
Step 1 – Connect the Wire to the Charging Station
Start by placing the charging station in its planned location before laying any wire.
Most Landroid models, including the Worx Landroid WR155 and Worx Landroid M500, use two wire terminals on the charging base:
- one terminal for the outgoing wire
- one terminal for the returning wire
Insert the boundary wire securely into the correct terminals according to the station markings.
Before moving forward:
- ensure the station sits level
- confirm the power supply is stable
- leave enough straight wire near the base
- avoid immediate sharp turns leaving the station
Many docking problems later come from poor charging station positioning rather than the mower itself.
It’s also smart to leave a small extra loop of wire behind or beside the charging station. This makes future repositioning much easier without replacing large wire sections.
Step 2 – Lay the Wire Around the Lawn Perimeter
Begin routing the wire counterclockwise around the lawn perimeter following your planned layout.
As you work around the yard:
- maintain consistent spacing from edges
- avoid overly sharp corners
- follow smooth curves whenever possible
- keep the wire tight against the ground
At this stage, do not worry about making the installation look perfect. Minor adjustments are normal later.
Pay extra attention to difficult areas such as:
- narrow corridors
- gravel transitions
- slopes
- fence corners
- tree islands
One common beginner mistake is pulling the wire too tightly around corners. Slightly smoother curves usually produce more reliable navigation and reduce wheel spinning during return-to-base behavior.
Step 3 – Secure the Wire With Pegs
Use pegs or stakes to hold the wire tightly against the ground as you continue around the lawn.
In most situations, peg spacing of roughly:
- 70–100 cm on straight sections
- closer spacing near turns and slopes
works well.
However, difficult terrain often requires more pegs than expected.
Loose wire sections can create several problems over time:
- mower blades cutting exposed wire
- wire lifting after rain
- poor signal consistency
- navigation instability
Pay special attention to uneven ground where the wire naturally wants to rise above the surface.
A rubber mallet usually makes peg installation easier while reducing the risk of damaging the stakes.
Step 4 – Create Islands Around Obstacles
If your lawn includes delicate obstacles, now is the time to create islands.
Common examples include:
- flower beds
- ponds
- exposed roots
- irrigation covers
- gravel sections
To create an island:
- Route the wire from the main perimeter toward the obstacle
- Loop around the obstacle
- Return along the exact same path
When the outgoing and returning wires touch closely together, the signals cancel each other out. This allows the mower to cross over the paired wire safely while still recognizing the protected island area.
Keep island layouts as simple as possible. Overcomplicated islands create more troubleshooting opportunities later.
Many experienced owners also avoid unnecessary islands entirely if the mower can safely bump into the object without causing damage.
Step 5 – Complete the Loop Correctly
After routing the wire around the entire lawn, return the wire to the charging station and connect the final end to complete the loop.
Before securing everything permanently:
- double-check all wire connections
- inspect for accidental wire crossings
- verify that islands return correctly
- confirm there are no loose exposed sections
Most charging stations include a loop indicator light. If the light shows an error, the mower may not detect the boundary signal properly.
Common causes include:
- damaged wire
- incomplete connections
- reversed terminals
- crossed wire sections
Finding these issues now is much easier than troubleshooting after the entire wire has been buried.
Step 6 – Test the Installation Before Finalizing
Before burying the wire or trimming excess sections, run several full mowing and docking cycles.
Watch carefully for:
- repeated bumping
- failed docking attempts
- wheel slipping
- missed grass sections
- navigation hesitation
- difficulty in narrow passages
This testing phase is where most real-world improvements happen.
Many experienced Landroid owners adjust:
- corner angles
- wire spacing
- peg placement
- charging station alignment
multiple times during the first few weeks.
That’s completely normal.
A layout that works reliably long-term usually comes from observation and gradual refinement rather than getting everything perfect on the first attempt.
How to Handle Narrow Corridors and Tight Spaces
Narrow corridors are one of the most challenging parts of any Worx Landroid installation, and they’re also the place where most unexpected problems show up after setup.
On paper, a passage might look wide enough for the mower to pass through easily. In reality, the combination of wheel tracking, wire positioning, turning behavior, and boundary signal detection can make these areas much less forgiving than expected.
This is especially important in layouts where the mower must repeatedly travel through a corridor to return to the charging station or access a second lawn zone.
What Happens When Wires Are Too Close Together
A common concern is whether the mower gets confused when boundary wires run close to each other in narrow passages.
In normal installations, this is not a problem because:
- the outgoing and return wires carry signals that effectively cancel each other
- the mower detects the edge of the loop, not individual wire lines
- overlapping wires are intentionally used in island setups
However, problems can occur when spacing becomes inconsistent or when the corridor is extremely tight.
Typical issues include:
- the mower “drifting” toward one side
- repeated bumping into edges
- difficulty maintaining a stable path through the corridor
- occasional hesitation during return-to-base mode
These issues are usually caused by layout geometry, not signal interference.
70 cm Corridor Example (Real-World Scenario)
A common real-world case is a narrow passage around 70 cm wide, often connecting two lawn sections or separating lawn from gravel or pavement.
In situations like the one discussed by many Landroid users, the layout often includes:
- one side bordered by pavement (hard edge)
- the other side bordered by gravel or softer terrain
- boundary wire spaced differently on each side (e.g., 8–10 cm vs 26 cm)
At first glance, the corridor may seem sufficient. However, several real-world complications can appear:
- slight mowing path variation causes wheel edge contact with gravel
- wire spacing differences create uneven navigation behavior
- return-to-base paths are less predictable than normal mowing passes
One key insight from experienced users is that the mower does not always follow the wire in a perfectly centered way. Small variations in steering angle can cause it to drift closer to one side, especially during turns or when the ground is uneven.
Because of this, some owners choose to simplify narrow corridor setups rather than trying to optimize them too aggressively.
When 90-Degree Turns Are Better Than Triangles
Many installation guides recommend using the Bertelsen triangle method for right-angle turns, but this is not always necessary in narrow corridors.
In practice:
- the triangle method helps create smoother corner transitions
- it reduces wheel stress in sharp wall corners
- it improves guidance around obstacles with tight geometry
However, in a 70 cm corridor or similar narrow space, the triangle can sometimes:
- consume too much usable width
- increase the risk of wire overlap issues
- reduce flexibility for future adjustments
In these cases, a simple 90-degree turn is often more practical, especially when:
- one side of the corridor is a safe hard surface (like tiles or pavement)
- the mower is not at risk of falling or damaging itself on that side
- the passage is used mainly for straight traversal rather than turning around obstacles
The key idea is that the mower can handle occasional contact with safe surfaces, so forcing a complex corner solution is not always necessary.
When to Use Multi-Zone Setup Instead
In more difficult layouts, especially when corridors are long, narrow, or irregular, a multi-zone configuration may be a better long-term solution than trying to perfect the passage itself.
Multi-zone setups are useful when:
- the corridor is consistently problematic for navigation
- the mower struggles to return to the charging station reliably
- the passage includes gravel, slopes, or uneven edges
- adjustments have already been attempted without success
Instead of forcing the mower through a difficult transition every cycle, each lawn section is treated as a separate zone, allowing more predictable mowing behavior.
This approach reduces stress on both the mower and the boundary wire layout, and it often leads to more stable long-term performance.
Key Takeaway for Narrow Spaces
Narrow corridors are not just about physical width — they are about navigation reliability over time.
A layout that works on day one may still cause issues weeks later due to:
- soil movement
- grass growth changes
- seasonal ground shifts
- repeated wheel tracking
For this reason, it’s often better to prioritize simplicity and reliability over perfect geometric optimization when designing tight spaces in a Landroid boundary wire setup.
Do You Really Need the Bertelsen Triangle?
The Bertelsen triangle is one of those installation techniques that sounds “mandatory” when you first read the official Worx documentation—but in real-world use, it’s often misunderstood and overused.
At its core, the method is designed to help the mower handle sharp 90-degree corners more smoothly by creating a gradual turning radius instead of forcing an abrupt direction change. This reduces wheel stress, improves tracking, and helps the mower follow the boundary wire more reliably in tight edges.
But the important question is: do you actually need it everywhere?
The short answer is no.
In practice, the Bertelsen triangle is a special-case solution, not a universal requirement.
What the Bertelsen Method Does
The Bertelsen triangle modifies a sharp corner by extending the boundary wire outward in a triangular shape before bringing it back to the next segment of the perimeter.
This creates:
- a smoother turning path for the mower
- less wheel slipping at corners
- more predictable navigation in tight edge transitions
It is most useful when the mower must follow a boundary very closely, especially near vertical structures like walls or fences.
Think of it as a way to “soften” geometry that would otherwise force the mower into an abrupt directional change.
When the Triangle Helps
The Bertelsen triangle is genuinely useful in certain situations, especially when:
- the corner is a hard 90-degree turn against a wall
- the mower consistently bumps or hesitates at the same point
- the terrain is slightly uneven near the corner
- the edge is important for precise mowing coverage
In these cases, the triangle can reduce repeated stress on the wheels and improve long-term reliability.
It is particularly helpful in layouts where the mower follows the boundary wire closely during both mowing and return-to-base cycles.
When You Can Skip It
Despite its benefits, the triangle is not always necessary—and in some cases, it can actually make the layout worse.
You can usually skip it when:
- the corner borders a safe hard surface like pavement
- the mower is allowed to partially drive over the edge zone
- the corner leads into a wide, open area
- the passage is already part of a smooth curve or gentle turn
In narrow corridors especially (like 70 cm passages), the triangle can consume valuable space and increase the chance of awkward wire geometry. In these cases, a simple rounded curve or even a clean 90-degree turn may perform just as well—or better.
Common Bertelsen Mistakes
Many installation problems actually come from misusing the triangle rather than skipping it.
Some of the most common mistakes include:
- making the triangle too large for the available space
- applying it to every corner by default, even when unnecessary
- creating overlapping wire sections in tight areas
- forcing it into narrow passages where geometry becomes too complex
These mistakes can lead to:
- unstable navigation behavior
- unnecessary wire tension
- confusing edge detection in tight zones
The key idea is that the Bertelsen triangle should improve navigation—not complicate the layout.
Practical Rule of Thumb
A useful way to think about it is this:
- Use the triangle when you need precision around a fixed obstacle
- Skip it when the mower has room to naturally turn or correct its path
Most experienced Landroid owners eventually stop using it everywhere and instead apply it selectively only in problem corners.
In other words, it’s a tool—not a rule.
Common Boundary Wire Mistakes That Cause Most Problems
Most Landroid performance issues are not caused by the mower itself—they come from small boundary wire installation mistakes that seem harmless at first but create ongoing navigation problems later.
The tricky part is that many of these issues don’t show up immediately. The mower may work fine on day one, then gradually start missing areas, struggling in certain zones, or failing to return to the charging station reliably.
Below are the most common mistakes that experienced Landroid owners consistently report.
Placing the Wire Too Close to Corners
One of the most frequent issues is running the boundary wire too tightly around corners, especially sharp 90-degree turns.
When the wire is placed too close to a corner:
- the mower can overcorrect during turns
- wheels may slip or repeatedly bump the edge
- navigation becomes inconsistent over time
- return-to-base paths become less stable
This is especially problematic in narrow corridors or tight garden edges where there is already limited maneuvering space.
In many cases, slightly rounding the corner or using a smoother transition performs better than forcing a perfect geometric edge.
Using Sharp 90-Degree Turns Everywhere
While it might seem logical to create clean right-angle corners throughout the entire lawn, this often leads to poor real-world behavior.
Sharp turns can cause:
- hesitation during boundary tracking
- repeated wheel adjustments
- inefficient mowing paths near edges
- increased stress on navigation behavior in tight zones
The mower performs more reliably when it can “flow” along gentle curves rather than constantly reacting to abrupt direction changes.
This is why even official recommendations often include curved or modified corner designs instead of strict geometric layouts.
Leaving the Wire Too Loose
A loose boundary wire is one of the most underrated installation problems.
When the wire is not properly secured:
- it can lift after rain or irrigation
- mower blades may accidentally cut exposed sections
- signal stability may fluctuate slightly over time
- the wire becomes more vulnerable to garden tools or foot traffic
Loose sections are especially common on uneven terrain or slopes where the ground naturally shifts.
A consistent peg spacing and extra reinforcement in problem areas usually solves this issue long-term.
Poor Charging Station Placement
The charging station is not just a docking point—it directly affects navigation behavior near the boundary wire.
If placed incorrectly, it can lead to:
- repeated docking failures
- awkward turning angles near the base
- difficulty finding the return path
- congestion in narrow exit routes
Common mistakes include placing the station:
- too close to corners
- inside narrow corridors
- on slopes
- without enough straight wire approach space
Even a perfectly installed boundary wire can behave poorly if the docking area is not properly designed.
Burying the Wire Too Early
Many new users make the mistake of burying the wire immediately after installation.
This is risky because:
- layout adjustments are almost always needed in the first few weeks
- real mowing behavior often reveals hidden problem areas
- narrow passages and corners may require refinement
- seasonal ground changes can affect wire position
Experienced owners typically wait until after multiple mowing cycles before committing to permanent burial.
This allows time to observe real-world behavior and make small corrections.
Crossing or Twisting Boundary Wires
Crossing wires incorrectly is one of the fastest ways to cause signal problems.
While intentional overlapping is used in island setups (where wires run parallel and close together), accidental crossings can lead to:
- “no loop signal” errors
- inconsistent boundary detection
- sudden mowing interruptions
It’s important to keep a clear mental distinction between:
- intentional parallel overlap (safe, used in islands)
- accidental wire crossing (problematic)
Ignoring Future Lawn Adjustments
One mistake many beginners don’t think about is planning only for the current lawn layout.
Over time, lawns change due to:
- new garden beds
- seasonal landscaping
- tree growth
- patio expansion
- soil movement
If no extra wire slack or adjustment loops are left during installation, even small changes later can require partial or full reinstallation.
Leaving small hidden wire reserves in key areas is a simple but powerful way to avoid future rework.
Key Takeaway
Most boundary wire problems are not random—they come from predictable installation choices made early in the setup process.
The good news is that once you understand these common mistakes, you can design a layout that avoids most long-term issues from the beginning, instead of constantly fixing them afterward.
Testing Your Boundary Wire Before Final Installation
Before you bury the wire or consider the installation “finished,” testing is one of the most important steps in the entire setup process. This is where you confirm whether your layout actually works in real-world conditions—not just on paper.
Many Landroid owners skip or rush this stage, only to discover later that the mower struggles in narrow corridors, misses sections of lawn, or fails to return to the charging station reliably. These issues are much easier to fix before the wire is permanently secured.
Think of this phase as a “trial run” that helps you refine the system before locking everything in place.
How to Run a Full Boundary Test
Start by powering on the mower and letting it complete several full mowing cycles under supervision.
During testing, observe how the mower behaves in different parts of your lawn:
- perimeter edges
- narrow corridors
- corners and turns
- transition zones (grass to gravel or pavement)
- return path to the charging station
You don’t need to watch every second, but you should pay close attention when the mower enters known “risk areas” from your layout plan.
If possible, test under slightly different conditions as well, such as:
- dry grass vs slightly damp grass
- different mowing times of day
- areas with different sunlight or shade
Small environmental changes can sometimes reveal navigation issues that aren’t obvious during the first run.
What to Watch for During the First Mowing Cycles
During early testing, the goal is not perfection—it’s identifying patterns.
Pay attention to whether the mower:
- consistently follows the boundary wire smoothly
- hesitates or repeatedly corrects direction in certain zones
- struggles in narrow passages or tight turns
- bumps excessively against walls or edges
- drifts toward gravel or soft edges
- finds the charging station reliably every time
Some minor adjustments are normal in the beginning. However, repeated behavior in the same location usually indicates a layout issue rather than a random glitch.
Signs Your Layout Needs Adjustment
There are a few clear warning signs that your boundary wire layout needs improvement:
- The mower repeatedly gets stuck in the same corridor or corner
- It fails to return to the charging station consistently
- One specific area of the lawn is always missed or under-mowed
- The mower slows down or hesitates at certain wire sections
- Frequent “no loop signal” or boundary errors appear
If you notice any of these patterns, avoid burying the wire immediately. Instead, make small adjustments such as:
- slightly widening narrow passages
- smoothing sharp corners
- adjusting wire distance from edges
- improving peg stability in loose ground
Even small changes can significantly improve overall performance.
Fine-Tuning Is Normal (and Expected)
One of the most important things to understand is that very few Landroid installations are perfect on the first attempt.
Real-world lawns are unpredictable:
- grass grows and changes terrain slightly
- soil shifts after rain
- wheels create small ruts over time
- seasonal conditions affect traction
Because of this, it’s completely normal to adjust the boundary wire multiple times during the first week or two.
Experienced users often treat the first mowing period as a calibration phase, where the layout gradually evolves based on observed behavior.
When You Can Move to Final Installation
You’re ready to finalize (and potentially bury) the wire only when:
- the mower completes full mowing cycles without errors
- docking behavior is consistent and reliable
- narrow corridors are stable during repeated passes
- no persistent problem zones remain
- minor adjustments have stopped being necessary
Once these conditions are met, you can confidently secure or bury the wire knowing the layout is already optimized for real-world use.
Proper testing is what separates a frustrating setup from a long-term reliable system. Taking a little extra time here often saves hours of troubleshooting later.
Troubleshooting Boundary Wire Problems
Even with careful installation, boundary wire issues can still appear after the system is running for a while. This is completely normal, especially during the first mowing season when the layout is still being refined.
The key is not to panic or assume the mower is malfunctioning. In most cases, boundary wire problems come down to a small physical issue in the loop or a layout detail that needs adjustment.
Below are the most common problems and how to approach them logically.
“Wire Missing” or “No Loop Signal”
This is one of the most common error messages and usually indicates that the mower cannot detect a complete boundary loop.
Typical causes include:
- broken or cut boundary wire
- loose or disconnected wire at the charging station
- damaged connector or corrosion in a joint
- wire accidentally unplugged during maintenance
First, check the charging station connections carefully. If everything looks correct, walk the perimeter and look for visible damage or sections where the wire may have been cut or pulled loose.
Using waterproof connectors from the start can significantly reduce this type of issue.
Robot Stops Randomly Near Certain Areas
If the mower consistently stops in the same location, the issue is usually not random—it’s location-specific.
Common causes include:
- unstable wire placement in that area
- loose pegs allowing wire movement
- uneven ground affecting wheel contact
- interference caused by sharp turns or tight geometry
Pay attention to whether the stopping point is near:
- corners
- narrow corridors
- slopes
- transitions between grass and hard surfaces
These are the most likely areas where small layout imperfections become noticeable.
In many cases, simply re-securing the wire or slightly adjusting spacing resolves the issue.
Landroid Cannot Return to the Charging Station
Return-to-base failures are often related to navigation difficulty rather than signal loss.
Common reasons include:
- charging station placed too close to corners or obstacles
- insufficient straight wire leading into the base
- narrow or complex corridors near the return path
- overly sharp turns near the docking zone
The mower relies heavily on predictable wire guidance when returning home. If the final approach path is too tight or irregular, it may overshoot or repeatedly correct its direction.
Improving the straight entry path to the charging station often resolves this problem more effectively than changing the mower settings.
Robot Leaves the Lawn Area
If the mower occasionally crosses the boundary, this usually indicates a layout or spacing issue rather than a system failure.
Possible causes include:
- boundary wire placed too far from the edge
- uneven terrain causing wheel drift
- worn grass edges reducing physical guidance cues
- incorrect installation around soft boundaries
This is more likely to happen near:
- flower beds
- slopes
- gravel transitions
- poorly defined lawn edges
Reducing wire distance slightly or improving edge definition (for example with edging stones) can help stabilize behavior.
Boundary Wire Break Detection Tips
Wire breaks are often invisible, especially if the wire is buried or covered by grass.
If you suspect a break:
- check recent landscaping or gardening activity
- look for sections where the mower suddenly stopped working
- inspect high-risk areas such as edges, slopes, and corners
- check connectors for corrosion or loose contact
In more complex cases, a wire break detector tool can help pinpoint the exact location without digging up the entire loop.
Leaving extra wire slack during installation can make future repairs much easier, as damaged sections can be reconnected without replacing long runs of wire.
Weak Signal After Rain or Seasonal Changes
Environmental conditions can sometimes affect boundary wire performance, even if the installation was initially stable.
Common factors include:
- soil movement after heavy rain
- wire shifting slightly under soft ground
- increased moisture affecting connector stability
- grass growth altering physical wire position
If issues appear after weather changes, inspect areas where the wire is under stress or poorly supported. Adding additional pegs or improving insulation at connectors usually restores stability.
Key Takeaway
Most boundary wire problems are not permanent failures—they are symptoms of small installation or environmental changes.
The best troubleshooting approach is always:
- Identify whether the issue is location-specific
- Check physical wire integrity first
- Focus on layout geometry near problem areas
- Make small adjustments instead of large redesigns
With a properly installed system, most issues can be resolved quickly without replacing the entire boundary wire.
Can You Bury the Boundary Wire?
Yes—you can bury the boundary wire, and in many cases it’s the final step that makes a Landroid setup look clean and permanent. However, the important question is not whether you can bury it, but when and how you should do it.
Many new owners make the mistake of burying the wire too early, before the layout has been fully tested in real mowing conditions. Once the wire is buried, making adjustments becomes significantly more time-consuming.
Pros and Cons of Buried Wire
Burying the wire has both practical benefits and long-term trade-offs.
Advantages:
- Cleaner lawn appearance (no visible wire)
- Reduced risk of accidental cutting during gardening
- Better protection from pets, UV exposure, and weather
- More stable long-term installation in well-settled soil
Disadvantages:
- Harder to modify layout later
- Troubleshooting becomes slower
- Repairs require digging up sections of lawn
- Less flexibility for seasonal lawn changes
Because of this trade-off, many experienced users delay burying until the system has proven stable for at least a few weeks.
How Deep Should You Bury It?
In most residential installations, the boundary wire only needs to be buried shallowly—just enough to keep it protected from everyday surface activity.
Typical depth:
- 1–5 cm below the surface
This is enough to hide the wire from view while still allowing signal transmission to remain strong and stable.
Going too deep is unnecessary and can sometimes make future repairs harder without providing additional performance benefits.
In many cases, simply pressing the wire into soft soil or lightly covering it with grass roots is sufficient.
Why Many Owners Wait Before Burying the Wire
Experienced Landroid users rarely bury the wire immediately after installation. Instead, they wait through an initial testing period where the mower runs multiple full cycles.
This is because early use often reveals:
- narrow corridors that need adjustment
- corners that cause repeated bumping
- charging station alignment issues
- underperforming edge coverage
- zones that require re-spacing
Once the mower consistently performs well, the layout can be considered stable enough for burial.
Think of it as “locking in” a proven design rather than guessing in advance.
Best Time to Bury the Wire Permanently
The ideal time to bury the boundary wire is when:
- the mower completes full mowing cycles without errors
- all narrow passages have been tested and adjusted
- no frequent layout changes are expected
- seasonal lawn conditions have stabilized
- charging station docking is consistently reliable
At this stage, burying the wire becomes a final finishing step rather than part of ongoing experimentation.
Many owners also choose to bury only the most exposed sections first (such as walkways or high-traffic areas) and leave less critical sections unburied until later.
Key Takeaway
Burying the boundary wire is not a required step for functionality—it is a refinement step for appearance and durability.
The best approach is simple:
- Install and test first
- Adjust until performance is stable
- Then bury once you’re confident the layout won’t change
This ensures you don’t sacrifice flexibility too early in the setup process, while still achieving a clean and permanent final result.
Recommended Boundary Wire Accessories
While a Landroid can technically work with just the basic installation kit, most real-world setups benefit from a few additional accessories. These small upgrades don’t change how the mower operates, but they significantly improve reliability, reduce maintenance work, and make future repairs much easier.
This is especially important for more complex lawns with slopes, narrow corridors, gravel edges, or multiple mowing zones.
Waterproof Wire Connectors
One of the most important accessories for any boundary wire installation is a set of waterproof connectors.
Over time, connections are often exposed to:
- rain and moisture
- soil movement
- temperature changes
- accidental pulling during garden work
Standard connections can degrade slowly, leading to intermittent signal issues that are difficult to diagnose.
Waterproof connectors help maintain a stable loop signal and make future repairs much simpler. If a wire breaks, you can reconnect it without redoing large sections of the installation.
Extra Boundary Wire
Even if your lawn is relatively small, it’s always a good idea to have extra boundary wire on hand.
Extra wire is useful for:
- expanding lawn areas later
- adjusting narrow corridors
- redesigning islands
- repairing damaged sections
- improving edge spacing after testing
Many installation issues only become obvious after several mowing cycles. Having spare wire available means you can make adjustments immediately without waiting for new materials.
Heavy-Duty Pegs
Standard pegs included in mower kits are usually sufficient for flat lawns, but they can struggle in:
- uneven soil
- sloped areas
- sandy or loose ground
- high-traffic garden paths
Heavy-duty pegs provide stronger ground hold and reduce the chance of wire movement over time. This helps maintain consistent boundary accuracy, especially in areas where the mower frequently turns or crosses near edges.
Loose wire is one of the most common causes of long-term navigation issues, so improving peg quality can have a noticeable impact on system stability.
Wire Repair Kits
Even a well-installed boundary wire system may eventually experience damage due to:
- accidental gardening cuts
- lawn aeration tools
- digging animals
- long-term soil movement
A wire repair kit typically includes connectors, insulation components, and sometimes small sections of replacement wire.
Having a repair kit ready means you can fix issues immediately instead of dismantling large sections of your installation. This is especially useful for maintaining uptime during peak mowing seasons.
Wire Break Locator Tools
For more complex lawns, especially larger properties, a wire break locator tool can save significant time during troubleshooting.
Instead of digging up the entire perimeter, these tools help identify the approximate location of a wire fault. This is particularly helpful when:
- the mower suddenly reports a “no loop signal” error
- the wire is buried and not visible
- multiple potential damage points exist
While not essential for small lawns, this tool becomes increasingly valuable as layout complexity increases.
Optional but Useful: Layout Planning Tools
Although not physical accessories for the mower itself, simple planning tools can improve installation quality significantly:
- measuring tape or wheel
- lawn sketch templates
- marking spray or chalk
- string line for straight edges
These help ensure consistent spacing and more accurate layout decisions, especially around corners and narrow passages.
Key Takeaway
Boundary wire accessories are not about making the mower “work better”—they are about making the installation more stable, flexible, and maintainable over time.
If there is one priority, it should be this:
Reduce future rework, not just improve initial setup.
Investing in a few key accessories early can prevent hours of troubleshooting later and make long-term maintenance much easier.
FAQ – Worx Landroid Boundary Wire Installation
This section answers the most common real-world questions new Landroid owners have during boundary wire installation. Many of these issues come directly from user experiences in forums and troubleshooting discussions, especially when dealing with narrow corridors, edge spacing, and return-to-base behavior.
Can boundary wires cross each other?
No, boundary wires should not cross each other.
However, they can run closely in parallel in certain situations, such as creating islands around flower beds or obstacles. In these cases, the signal cancels out and the mower treats the area as a “no-go zone.”
The key difference is:
- ✔ Parallel wires (close together) = allowed and commonly used
- ✘ Actual crossing (overlapping paths) = should be avoided
Crossing wires incorrectly can cause signal errors or unpredictable mower behavior.
How far should the wire be from the edge?
The ideal distance depends on the type of edge.
General real-world guidelines:
- Hard edges (pavement, tiles): 10–18 cm
- Soft edges (soil, flower beds): around 26 cm
- Gravel or unstable borders: 26–35 cm
Many users start with safer spacing first, then adjust closer after testing mower behavior over a few cycles.
Can I install the wire on concrete or gravel edges?
The wire should not be installed on concrete or gravel surfaces directly.
Instead, it should run:
- along the boundary between grass and the surface
- at a safe distance depending on wheel traction and mower model
Gravel areas require extra caution because loose stones can affect traction and blade safety. In most cases, keeping a wider buffer zone is recommended.
What is the minimum width for a narrow passage?
There is no single universal number, but in practice:
- 70 cm or wider = usually workable with careful setup
- below 70 cm = may require multi-zone strategy or simplified layout
However, usable width depends on:
- wire spacing on both sides
- edge type (gravel vs pavement)
- corner geometry
- slope or uneven ground
A passage that looks wide enough visually may still behave unpredictably if the wire layout is too tight or complex.
Should I bury the boundary wire immediately?
No, it is strongly recommended to wait.
Most experienced users run the mower for several days or even weeks before burying the wire.
This allows you to:
- identify narrow corridor issues
- adjust edge spacing
- fix corner behavior
- optimize charging station approach
Burying too early makes adjustments much harder later.
Why does my Landroid keep missing certain areas?
This is usually not a mower defect. It is typically caused by one of the following:
- uneven boundary wire spacing
- narrow corridor navigation limitations
- wheel slip on slopes or soft ground
- overly complex island layout
- inconsistent mowing pattern behavior
In many cases, slightly adjusting wire position or simplifying the layout improves coverage more effectively than changing mower settings.
Do I need the Bertelsen triangle on every corner?
No.
The Bertelsen triangle is only useful for specific sharp corners, especially where the mower repeatedly struggles or bumps into a fixed edge.
You can usually skip it when:
- the corner borders a safe hard surface
- the mower has enough space to turn naturally
- the area is already part of a smooth curve
Overusing the triangle can actually make tight layouts more complicated than necessary.
What happens if the boundary wire breaks?
If the wire breaks, the mower will typically:
- stop mowing
- show a “no loop signal” or similar error
- fail to return to the charging station
To fix it, you need to locate the break and reconnect the wire using a waterproof connector or repair kit.
Leaving extra wire slack during installation can make this process much easier in the future, especially for buried sections.
Key Takeaway
Most boundary wire issues are not random—they are almost always related to:
- layout design
- spacing decisions
- or installation quality
A careful setup combined with small adjustments during the first mowing cycles will prevent the majority of long-term problems.
Final Thoughts
Installing a Worx Landroid boundary wire is less about following instructions perfectly and more about understanding how the mower behaves in real outdoor conditions. What looks correct on paper often needs small adjustments once the system starts running, especially in areas like narrow corridors, corners, and transitions between different lawn surfaces.
Most long-term issues—missed grass patches, docking problems, or navigation hesitation—don’t come from the mower itself, but from small layout decisions made during installation. That’s why planning, testing, and gradual refinement matter more than rushing to finish the setup in one go.
A well-installed system usually shares a few common traits: the charging station has a clean approach path, edges are spaced consistently, narrow passages are kept simple rather than over-engineered, and the boundary wire is tested multiple times before being buried. Once these basics are right, the mower becomes largely self-sufficient.
It’s also important to accept that some fine-tuning is normal. Even experienced users adjust wire positions after the first few mowing cycles as the lawn settles and real-world behavior becomes clearer. This is not a sign of a bad installation—it’s part of optimizing the system for your specific yard.
Whether you’re setting up a Worx Landroid WR155, a Worx Landroid M500, or another model in the range, the goal is the same: build a layout that is simple, stable, and easy for the mower to understand over time.
If you focus on clean geometry, realistic spacing, and patient testing before finalizing the installation, your Landroid will perform far more reliably—and require far less troubleshooting in the long run.