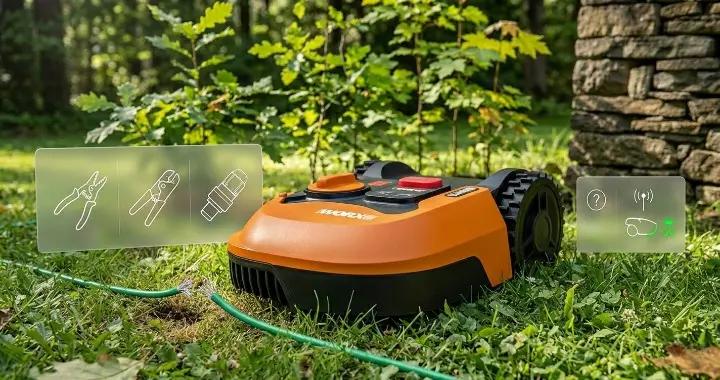
If your Worx Landroid mower is not following its path or suddenly stops working, the problem might be a broken boundary wire. This wire tells your mower where to mow and where to stop. Without it, your mower can’t do its job properly.
Finding and fixing a broken boundary wire might sound tricky, but it doesn’t have to be. With the right tools and some simple steps, you can locate the break and repair it yourself.
In this guide, we will show you how to identify a broken wire, check it step by step, and fix it quickly. We will also suggest some tools and accessories that make the repair easier and help prevent future problems.
By the end of this article, you will know exactly what to do to get your mower back on track. No more guessing or waiting for a repair service—just a clear, DIY solution that works.
How to Identify a Broken Boundary Wire
The first step in fixing your mower is knowing if the boundary wire is really broken. There are a few clear signs to look for.
One of the easiest ways to tell is by checking your mower’s app. If you see a “No Loop Signal” warning, it usually means the wire is not sending the correct signal.
You can also look at the charging station. If the blue light is flashing, that is another strong indicator of a broken boundary wire.
Next, do a quick visual check of the wire around the yard. Look for any cuts, kinks, or places where the wire connectors might be loose. Even small damage can stop the mower from working properly.
Pay attention to splices, too. If the wire has been repaired before, the connection points are more likely to fail. Checking these areas first can save you time.
By noticing these signs early, you can confirm the problem before moving on to the repair. This way, you know exactly where to start and avoid unnecessary work.
Tools You’ll Need to Fix the Wire
Before you start repairing the boundary wire, it’s important to have the right tools. Using the correct tools makes the job faster and safer.
First, you will need a multimeter. This tool helps you check if the wire is carrying electricity. It can quickly show you where the break is, so you don’t have to guess.
You will also need wire cutters and strippers. These are used to trim damaged wire ends and prepare the wire for reconnecting.
Next, get some waterproof wire connectors or couplers. These protect the repaired section from rain and moisture. Using good connectors ensures your fix lasts a long time.
For large gardens, you might want a wire break detector tool. This tool makes it even easier to find breaks without walking the whole perimeter. Some affordable options include the NF-820 or MS6812 models.
Finally, keep some spare low-voltage wire handy. Sometimes the break is too short to reconnect directly, and you’ll need a small piece of wire to bridge the gap.
Having all these tools ready before you start will make the repair process smooth and stress-free.
Step-by-Step Guide to Finding the Break
Finding the exact spot where the boundary wire is broken is the most important part of the repair. Follow these steps carefully.
Step 1: Walk the Wire
Start by walking along the boundary wire in your yard. Look for obvious damage, like cuts, kinks, or places where the wire is loose. Mark any suspicious spots with small flags or tape.
Step 2: Turn Off ECO Mode
If your mower has an ECO or low-power mode, turn it off. This ensures the mower sends a strong signal through the wire, making it easier to detect the break.
Step 3: Check Connectors
Inspect all wire connectors and splices. Loose or corroded connectors are often the cause of problems. Try reseating the wires in the connector or swapping connectors to see if the signal returns.
Step 4: Use a Multimeter
Set your multimeter to measure voltage or continuity. Check the wire section by section. If the multimeter shows no signal in a section, the break is likely in that area.
Step 5: Narrow It Down
Once you find a section with no signal, divide it into smaller segments. Check each segment with the multimeter until you locate the exact break.
Step 6: Optional: Use a Wire Break Detector Tool
If the break is hard to find or your yard is large, a wire break detector tool can help. It sends a signal through the wire and indicates where the break is. Tools like the NF-820 or MS6812 work well for this.
Step 7: Mark the Break
After locating the break, mark it clearly. This will help you when repairing the wire and ensure you don’t miss the spot.
By following these steps, you can quickly identify the broken section without guessing. The more careful you are in this step, the easier the repair will be.
How to Repair the Broken Wire
Once you’ve found the broken section of the boundary wire, it’s time to fix it. Follow these steps carefully.
Step 1: Trim Damaged Wire Ends
Use wire cutters to remove any frayed or damaged ends. Cutting back a little ensures you have clean wire for a strong connection.
Step 2: Insert Wires into a Waterproof Coupler
Slide each end of the trimmed wire into a waterproof connector or coupler. Make sure the metal parts inside touch the wire completely. This helps maintain a good electrical connection.
Step 3: Clamp the Coupler
Use pliers or a crimper to press the coupler firmly. The wire should be held tightly, and the connection should feel secure. For extra protection, some users heat-shrink the connector to keep it fully waterproof.
Step 4: Test the Connection
Before burying the wire again, check the mower’s charging station. A green light means the connection is good. You can also use your multimeter to ensure the signal passes through.
Step 5: Secure or Bury the Repaired Wire
Once the connection works, bury the wire back into the ground or secure it with clips. Make sure it is below the mower blades and in a safe location to avoid future damage.
Step 6: Optional: Use a Bridge Piece for Tight Sections
If the wire is too short to reach, add a small piece of low-voltage wire between the ends using two connectors. This gives a little slack and makes the repair easier.
Recommended Accessories
- GWHOLE Waterproof Wire Connectors – reliable and easy to use.
- Wirefy Heat Shrink Butt Connectors – extra protection against moisture.
- Spare Low-Voltage Wire – for bridging short gaps.
By following these steps, your boundary wire will be repaired safely and should last for years. Properly using connectors and testing the connection ensures your mower works perfectly again.
Recommended Accessories and Replacement Parts
Having the right accessories on hand makes repairing your boundary wire easier and faster. It also helps prevent future problems.
1. Waterproof Wire Connectors
Waterproof connectors are essential for a strong, long-lasting repair. They protect the connection from rain, moisture, and garden irrigation. Some good options include GWHOLE Waterproof Wire Connectors and Wirefy Heat Shrink Butt Connectors.
2. Spare Low-Voltage Wire
Keep some extra low-voltage wire in your shed. It’s useful if the broken section is too short to reconnect directly. Adding a small piece of wire can bridge the gap and give you a reliable connection.
3. Wire Break Detector Tool
For larger lawns, a wire break detector makes locating the break faster and easier. Tools like the NF-820 or MS6812 send a signal through the wire and pinpoint the problem area.
4. Pliers or Crimper
A good pair of pliers or a crimper is important to press connectors tightly. This ensures the wires stay connected even in harsh weather conditions.
5. Optional Protective Conduit
If your wire is in a high-traffic area or near garden tools, using a protective conduit can prevent future breaks. It’s a simple way to extend the life of your boundary wire.
Using these accessories not only makes repairs easier but also helps your mower stay reliable. Investing in quality connectors and tools saves time and frustration in the long run.
How to Prevent Future Boundary Wire Breaks
Fixing a broken boundary wire is one thing. Preventing future breaks saves time and keeps your mower running smoothly.
Bury the Wire Properly
Always bury your boundary wire 2–5 cm below the soil. This protects it from mower blades, garden tools, and foot traffic. Make sure the wire is straight and not twisted.
Avoid Collisions
Keep garden tools, hoses, and toys away from the wire path. Even small impacts can weaken the wire over time and cause breaks.
Check Connectors Regularly
Inspect all wire connectors and splices at least once a season. Loose or corroded connectors are a common cause of breaks. Tighten or replace them if needed.
Use Protective Conduits
In areas where the mower passes frequently or where there’s heavy foot traffic, use a small plastic conduit. This adds extra protection and prevents accidental damage.
Keep Spare Wire and Connectors on Hand
Having spare wire and waterproof connectors ready makes repairs quick and stress-free. You won’t have to scramble to find the right parts when a problem happens.
Inspect After Storms or Garden Work
After heavy rain, snow, or any garden renovation, check your boundary wire. Soil movement or digging can loosen the wire or connectors, leading to breaks.
By following these simple steps, you can significantly reduce the chances of your boundary wire breaking again. Preventive care keeps your mower running smoothly and saves you from future headaches.
FAQ – Worx Landroid Boundary Wire Issues
Q: How do I know if my boundary wire is broken?
A: Look for a flashing blue light on the charging station or a “No Loop Signal” warning in the Worx app. You can also inspect the wire visually for cuts or loose connectors.
Q: Can I just splice a short piece of wire to fix a break?
A: Yes. Use a waterproof connector or coupler to join the wires securely. For extra protection, you can heat-shrink the connection or use a quality crimper.
Q: How long does a repair usually last?
A: If done properly with waterproof connectors and buried safely, a repair can last several years. Regular inspections can help prevent future issues.
Q: Do I need special tools to find a break?
A: Not always. Walking the wire and checking connectors can work for small yards. However, a multimeter or a wire break detector tool is faster and more accurate, especially for large lawns.
Q: Can I prevent boundary wire breaks completely?
A: While no method is 100% foolproof, proper burial, protective conduits, and careful maintenance greatly reduce the risk of future breaks. Keeping spare wire and connectors ready also helps.
Q: What should I do if I can’t find the break?
A: If the break is hard to locate, a professional service or a wire break detector tool can help. Using spare wire and connectors, you can sometimes create a temporary fix while you find the exact location.
Q: Are there recommended accessories for long-term reliability?
A: Yes. Waterproof connectors like GWHOLE or Wirefy Heat Shrink Butt Connectors, a few spare low-voltage wire pieces, and optional protective conduits will make your repairs last longer and prevent future problems.
Final Thoughts
A broken boundary wire is a common problem for Worx Landroid owners, but it doesn’t have to stop your mower. With the right tools and a clear step-by-step approach, you can locate and repair the wire yourself.
Using waterproof connectors, spare wire, and a multimeter or detector tool makes the process faster and more reliable. These small accessories can save you time and frustration in the long run.
Regular inspections and proper installation help prevent future breaks. Bury wires correctly, protect them in high-traffic areas, and check connectors seasonally.
By following the steps in this guide, you can keep your mower running smoothly without waiting for a professional. DIY repairs are not only cost-effective but also give you confidence in maintaining your mower.