
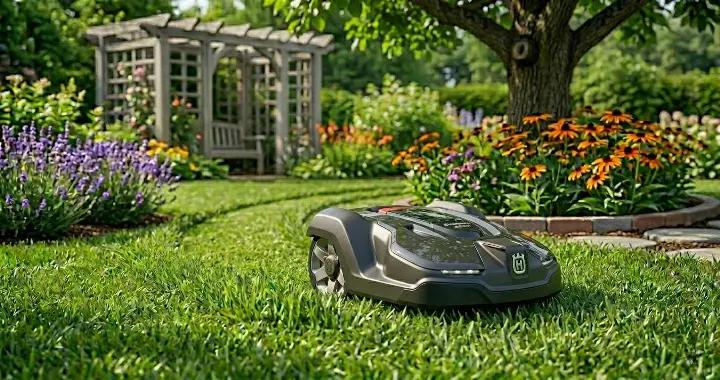
The Husqvarna Automower 430X is designed to make lawn care almost effortless, but like any robotic mower, it still needs regular maintenance to keep performing at its best. Many owners only start thinking about maintenance after the mower begins leaving uneven grass, struggling to return to the charging station, or getting stuck more often than usual.
The good news is that most of these problems are preventable. In many cases, a few minutes of routine cleaning and inspection each week is enough to keep the 430X running smoothly throughout the mowing season.
Unlike technical manuals that focus heavily on specifications and safety instructions, this guide is written for everyday owners who simply want practical, easy-to-follow maintenance advice. You do not need to be mechanically experienced to handle most routine maintenance tasks yourself.
In this guide, you will learn:
- how often to clean the mower
- the signs that the blades need replacement
- simple battery maintenance tips
- how to prevent common mowing and charging problems
- what to do before winter storage
- which maintenance mistakes new owners commonly make
You will also find quick maintenance routines, troubleshooting tips, and real-world maintenance advice that is easier to follow than a traditional technical manual. Whether you use your 430X on a small suburban lawn or a larger, more demanding yard, proper maintenance can help extend the mower’s lifespan and improve cutting performance over time.
Quick Maintenance Schedule for the 430X
One of the biggest mistakes new Husqvarna Automower 430X owners make is waiting until something feels wrong before doing maintenance. In reality, small routine checks are usually enough to prevent most common problems, including uneven cutting, charging issues, poor traction, and excessive grass buildup.
The good news is that the 430X does not require complicated servicing. Most maintenance tasks only take a few minutes if done consistently throughout the mowing season.
Here is a simple maintenance schedule that works well for most homeowners.
| Maintenance Task | Recommended Frequency |
|---|---|
| Brush off grass buildup | Weekly |
| Inspect blades for wear or damage | Every 2–4 weeks |
| Clean front wheels and underside | Monthly |
| Wipe charging contacts | Monthly |
| Check for trapped debris around wheels | Monthly |
| Replace blades | Every 1–3 months depending on lawn conditions |
| Inspect battery performance | Seasonally |
| Perform deep cleaning before winter storage | End of season |
| Store mower properly during winter | Off-season |
Weekly Maintenance
Weekly maintenance is mostly about preventing buildup before it becomes a larger problem. Wet grass clippings tend to collect underneath the mower deck, around the front caster wheels, and near the cutting disc.
For most lawns, a quick brush-off once or twice a week is enough. During periods of rapid spring growth or rainy weather, buildup can happen much faster than many owners expect.
A simple weekly routine usually includes:
- removing loose grass underneath the mower
- checking whether the wheels rotate freely
- inspecting the blades for visible damage
- wiping away mud or wet debris
Even five minutes of maintenance can make a noticeable difference in long-term performance.
Monthly Maintenance
Monthly maintenance should be a little more thorough. This is a good time to inspect areas that are easy to ignore during quick weekly cleanings.
Focus on:
- cleaning the charging contacts
- checking for grass wrapped around wheel axles
- inspecting the underside for compacted debris
- looking for signs of worn or bent blades
- checking whether the mower sounds louder than usual
Many navigation and traction problems begin with debris buildup that slowly accumulates over time.
Seasonal Maintenance
At the beginning and end of the mowing season, it helps to perform a deeper inspection of the mower.
This is the ideal time to:
- replace old blades
- inspect battery performance
- clean hard-to-reach areas
- update firmware if needed
- inspect the charging station and boundary wire connections
Seasonal maintenance becomes even more important for larger lawns where the mower operates for many hours each week.
Winter Storage Maintenance
Before storing the mower for winter, it is important to fully clean and dry the unit. Leaving wet grass or moisture trapped underneath the deck for months can lead to corrosion and unpleasant odors when spring arrives.
Before storage:
- clean the mower thoroughly
- inspect and replace worn blades if necessary
- charge the battery appropriately
- store the mower in a dry indoor location
- protect the charging station from prolonged winter weather if recommended for your setup
A little preparation before the off-season can help the mower start much more reliably when mowing season returns.
The 5-Minute Maintenance Routine Most Owners Actually Use
One reason many homeowners neglect mower maintenance is because they assume it takes a lot of time. In reality, most Husqvarna Automower 430X owners are not performing deep cleanings every few days. Instead, they follow a quick routine that helps prevent problems from building up over time.
For normal residential lawns, a simple 5-minute check once or twice a week is usually enough to keep the mower running reliably.
This routine is especially helpful during periods of fast grass growth, wet weather, or heavy mowing schedules.
Step 1: Turn Off the Mower
Before touching the blades or underside, always switch off the mower completely.
This not only improves safety, but also makes it easier to inspect the cutting area and wheels without accidentally activating the mower.
Step 2: Brush Off Grass Buildup
Most owners focus on the top of the mower, but the underside is where problems usually begin.
Use a soft brush or cloth to remove:
- wet grass clippings
- compacted debris
- mud around the cutting disc
- buildup near the front wheels
You do not need to make the underside spotless every time. The goal is simply to prevent thick layers of debris from accumulating week after week.
Grass buildup tends to happen much faster during spring growth or after mowing damp lawns.
Step 3: Quickly Inspect the Blades
You do not need to remove the blades during every inspection. A quick visual check is usually enough.
Look for:
- bent blades
- missing blades
- excessive dirt buildup
- torn or dull blade edges
Many owners only notice blade wear after the lawn starts looking uneven. Catching dull blades early helps maintain cleaner cuts and healthier-looking grass.
Step 4: Wipe the Charging Contacts
Dirty charging contacts are one of the most overlooked maintenance issues.
If grass residue, moisture, or oxidation begins building up on the contacts, the mower may eventually struggle to charge properly.
A quick wipe with a dry cloth is usually enough for routine maintenance.
Pay attention to:
- the metal contacts on the mower
- the charging station connection points
- visible dirt or discoloration
Step 5: Check the Front Wheels
The small front caster wheels collect more debris than many owners realize.
Wet grass, stringy weeds, mud, and small twigs can gradually reduce wheel movement and traction.
Spin the wheels briefly to make sure they rotate smoothly. If you hear grinding noises or notice resistance, remove any trapped debris before it gets worse.
Why This Simple Routine Matters
Most major maintenance problems do not appear overnight. They usually develop slowly from ignored grass buildup, dull blades, dirty contacts, or trapped debris.
A quick maintenance routine helps prevent:
- uneven cutting
- charging interruptions
- traction problems
- unnecessary battery strain
- excessive wheel wear
For many homeowners, spending five minutes on maintenance once or twice a week is far easier than dealing with larger repairs later in the season.
How to Clean the Automower 430X Properly
Cleaning the Husqvarna Automower 430X regularly is one of the easiest ways to improve cutting performance and avoid common reliability issues. Grass buildup may not seem serious at first, but over time it can affect wheel traction, airflow, blade movement, and even charging performance.
The good news is that cleaning the 430X is usually simple and does not require special tools. For most owners, the goal is not to make the mower look brand new every day. The goal is to prevent heavy buildup from slowly creating bigger problems.
Why Grass Buildup Causes More Problems Than Most Owners Expect
Many new owners are surprised by how quickly wet grass can accumulate underneath a robotic mower.
During periods of rapid spring growth or rainy weather, compacted grass can build up around:
- the cutting disc
- front caster wheels
- wheel axles
- underside edges
- charging contact areas
Small amounts of buildup are completely normal. The problem starts when wet debris remains trapped for long periods of time.
Over time, excessive buildup can lead to:
- reduced cutting efficiency
- poor wheel traction
- uneven mowing patterns
- extra strain on motors
- moisture retention underneath the deck
- unpleasant odors during storage
Lawns with thick or damp grass usually require more frequent cleaning than dry, light-growth lawns.
The Safest Way to Clean the Underside
One of the most common mistakes owners make is using aggressive cleaning methods that are unnecessary for routine maintenance.
In most cases, a gentle cleaning approach works best.
Start by turning the mower off completely and placing it on a stable surface. Many owners simply tilt the mower carefully onto its side for easier access to the underside.
Use a soft brush, cloth, or plastic scraper to remove:
- loose grass clippings
- wet debris
- compacted buildup around the cutting disc
- mud near the wheels
For stubborn dirt, a slightly damp cloth is usually enough.
Avoid using:
- metal scrapers
- abrasive wire brushes
- harsh chemicals
- high-pressure washers
Pressure washing may seem convenient, but forcing water into sensitive areas can eventually create electrical or bearing-related problems.
Don’t Forget the Front Wheels and Wheel Areas
The front caster wheels are one of the most overlooked cleaning areas on the 430X.
Because these wheels constantly rotate and pivot during navigation, they tend to collect:
- wet grass
- hair-like weeds
- mud
- stringy debris
When buildup becomes excessive, the mower may:
- struggle with traction
- turn less smoothly
- get stuck more often
- produce squeaking or grinding noises
Spin the wheels by hand occasionally during cleaning. If they do not rotate smoothly, remove any trapped material before it becomes tightly compacted.
Cleaning the Charging Contacts
Charging problems are sometimes caused by something surprisingly simple: dirty contacts.
Grass residue, moisture, and oxidation can gradually reduce charging efficiency over time.
Use a dry microfiber cloth or soft brush to gently clean:
- the metal charging contacts on the mower
- the charging station contact points
If you notice heavy discoloration or stubborn residue, use a cleaner specifically designed for electronic contacts rather than abrasive tools.
Many owners do not realize charging performance can slowly decline before obvious charging errors appear.
How Often Should You Clean the 430X?
Cleaning frequency depends heavily on lawn conditions.
For many homeowners:
- light cleaning once or twice a week is enough
- deep cleaning once a month works well
- rainy seasons may require more frequent attention
You may need to clean the mower more often if:
- grass grows rapidly
- the lawn stays damp
- the mower operates daily
- the yard contains mud or sandy soil
One useful habit is checking the underside briefly after mowing wet grass. Heavy buildup is much easier to remove when caught early instead of after multiple mowing cycles.
Signs Your Mower Needs Cleaning Sooner
The mower usually gives small warning signs before buildup becomes a serious problem.
Pay attention if you notice:
- uneven cutting quality
- clumps of grass left behind
- reduced traction on slopes
- louder wheel noise
- difficulty docking correctly
- visible debris around the cutting disc
In many cases, a quick cleaning session solves these issues before they turn into larger maintenance problems.
When to Replace the Blades (And the Signs Most Owners Miss)
The cutting performance of the Husqvarna Automower 430X depends heavily on one small but critical component: the blades. Unlike traditional lawnmower blades that are sharpened, robotic mower blades are designed to be replaced regularly rather than maintained.
Many owners wait too long before replacing them, which leads to uneven cutting, higher battery usage, and unnecessary strain on the mower.
The key is not to follow a strict calendar, but to recognize the early warning signs.
Signs Your Blades Are Getting Dull
Dull or worn blades rarely fail suddenly. Instead, performance declines gradually, which makes the problem easy to miss.
Here are the most common signs:
- Grass tips look torn or frayed instead of cleanly cut
- The lawn appears uneven even after a full mowing cycle
- The mower seems to “miss” patches it used to cut easily
- You notice more grass clumping rather than fine clippings
- The mower sounds slightly louder or less smooth during operation
One of the earliest indicators is grass appearance. If the lawn starts looking slightly “brownish” at the tips instead of clean green cuts, the blades are often the reason.
How Long Do 430X Blades Usually Last?
Blade lifespan depends heavily on lawn conditions rather than time alone.
Typical ranges:
- Light, dry lawns: 6–8 weeks
- Average residential lawns: 4–6 weeks
- Dense, fast-growing grass: 2–4 weeks
- Sandy or debris-heavy lawns: even shorter lifespan
Conditions that shorten blade life include:
- wet grass mowing
- sandy soil
- twigs or small debris on the lawn
- frequent daily mowing cycles
In other words, blade wear is more about environment than usage time.
Why Waiting Too Long Causes Bigger Problems
Many owners delay blade replacement because the mower still “seems to work.” However, dull blades don’t just affect appearance—they affect system efficiency.
If blades are worn for too long, you may notice:
- increased battery consumption
- more frequent mowing passes needed
- extra strain on cutting motors
- uneven lawn health over time
- higher likelihood of missed spots
The mower has to work harder to achieve the same result, which reduces overall efficiency.
Common Blade Replacement Mistakes
Blade replacement is simple, but a few common mistakes can reduce performance or even damage components:
- Reusing old screws that are worn or stripped
- Installing blades unevenly or mixing old and new blades
- Over-tightening screws, which can restrict blade movement
- Ignoring small cracks or bends in blades
- Delaying replacement until cutting quality is noticeably poor
A good rule of thumb: blades are inexpensive compared to the cost of reduced performance or lawn damage.
A Simple Rule Most Owners Follow
Instead of tracking exact dates, many experienced owners use a simple rule:
Replace blades as soon as cutting quality starts to decline—not when the mower stops working properly.
This small habit keeps cutting performance consistent and helps avoid the gradual decline that most users only notice too late.
In practice, checking the blades every couple of weeks takes only a few seconds but can significantly improve overall mowing results throughout the season.
Battery Maintenance Tips to Extend Lifespan
The battery is one of the most important long-term components in the Husqvarna Automower 430X, and also one of the most misunderstood. Many owners assume battery performance simply “wears out over time,” but in reality, everyday habits have a big impact on how long it lasts.
With a few simple maintenance practices, you can significantly extend battery lifespan and keep mowing performance consistent across multiple seasons.
The Biggest Mistake: Poor Winter Storage
One of the most common reasons for early battery degradation happens during the off-season.
Leaving the mower:
- fully discharged
- completely uncharged for months
- or stored in extreme temperatures
can reduce battery health over time.
Before winter storage, the battery should ideally be kept at a moderate charge level rather than empty or fully charged for long periods. This helps reduce stress on the battery cells during inactivity.
Avoid Deep Discharges During the Season
Unlike older battery types, lithium-ion batteries do not benefit from being fully drained.
In normal use, the 430X manages charging automatically, but problems can occur when:
- the mower is left unused for long periods
- it repeatedly struggles to return to the charging station
- charging contacts are dirty and cause incomplete charging cycles
Repeated deep discharges can slowly reduce total battery capacity over time.
Signs the Battery May Be Aging
Battery wear is usually gradual, not sudden. Most owners only notice it after performance changes become more obvious.
Common signs include:
- shorter mowing sessions before recharging
- more frequent returns to the charging station
- reduced performance on slopes or thick grass
- longer charging times than usual
- random stopping even when the lawn is not fully covered
It’s important to note that these symptoms can also be caused by dirty contacts or heavy grass buildup, so it’s worth checking maintenance basics before assuming battery failure.
Charging Habits That Help Extend Battery Life
Good charging habits can make a noticeable difference over time.
Helpful practices include:
- keeping the charging station clean and dry
- ensuring smooth docking without obstacles
- avoiding unnecessary interruptions during charging
- keeping firmware updated if available
- storing the mower in a moderate temperature environment when not in use
The key idea is consistency—stable charging conditions are better than irregular or interrupted cycles.
When Battery Issues Are Actually Maintenance Issues
Not all battery-related problems are caused by the battery itself.
In many cases, performance issues come from:
- dirty charging contacts
- grass buildup increasing energy consumption
- wheel resistance from debris
- uneven terrain causing higher load
This is why it’s important to check basic maintenance before assuming the battery needs replacement.
A Simple Rule for Battery Longevity
Most experienced owners follow a simple mindset:
Treat the battery as a long-term component, but protect it through small daily habits.
You don’t need special tools or technical knowledge. Consistent cleaning, proper storage, and stable charging conditions are usually enough to keep the battery performing well for years.
Common 430X Problems That Regular Maintenance Can Prevent
Most performance issues with the Husqvarna Automower 430X are not caused by major hardware failure. In fact, many of the most frustrating problems homeowners experience are the direct result of small maintenance tasks being missed over time.
The good news is that regular cleaning, blade replacement, and basic inspections can prevent most of these issues completely.
Below are the most common problems—and how simple maintenance helps avoid them.
Uneven Cutting or Missed Grass Patches
This is one of the first signs owners usually notice.
The mower may start leaving:
- thin strips of uncut grass
- random patches of uneven height
- areas that look “less clean” than others
In most cases, the cause is not navigation—it is cutting performance.
Common maintenance-related causes include:
- dull or chipped blades
- grass buildup under the cutting disc
- mowing in wet or overly long grass
- blades installed incorrectly or unevenly worn
Regular blade replacement and underside cleaning usually fix this issue quickly.
Frequent Getting Stuck or Navigation Issues
If the mower begins getting stuck more often than usual, it’s often not a mapping problem.
Instead, it is usually related to physical resistance on the mower itself.
Typical causes include:
- grass wrapped around front caster wheels
- mud buildup reducing traction
- uneven wheel rotation due to debris
- wet soil conditions combined with dirty wheels
When wheels are cleaned regularly, the mower is able to move more smoothly and follow its boundary wire system without interruption.
Charging Problems or Inconsistent Docking
Charging issues are often misunderstood as battery failure, but many cases are much simpler.
Symptoms include:
- mower failing to dock properly
- intermittent charging
- stopping at the station without charging
- repeated docking attempts
Common maintenance-related causes:
- dirty charging contacts on the mower or station
- grass or dust blocking proper contact alignment
- minor oxidation buildup over time
- uneven placement of the charging base
A quick cleaning of contact points often resolves the issue immediately.
Poor Performance on Slopes or Wet Grass
If the mower struggles on inclines or slippery areas, it usually comes down to traction rather than power.
Typical causes include:
- debris buildup in wheel tread
- compacted wet grass under wheels
- worn or dirty front caster wheels
- general lack of routine cleaning during wet seasons
Maintaining clean wheels significantly improves grip and stability, especially in damp conditions.
Noisy Operation or Grinding Sounds
A healthy mower should run relatively smoothly and quietly. If you begin hearing unusual noise, it is often a warning sign.
Possible causes include:
- debris trapped in wheel assemblies
- grass buildup rubbing against internal components
- dull or damaged blades creating vibration
- uneven cutting disc balance due to dirt accumulation
In many cases, a thorough cleaning restores normal operation without any repairs needed.
The Key Pattern Behind Most Problems
When looking at all of these issues together, a clear pattern emerges:
Most “technical problems” are actually maintenance problems in disguise.
Small issues like grass buildup, worn blades, or dirty contacts gradually turn into performance problems if ignored.
Why Prevention Is Easier Than Repair
The advantage of the 430X is that most maintenance tasks are simple and fast. A few minutes of routine care each week can prevent hours of troubleshooting later.
Instead of reacting to problems after they appear, regular maintenance helps ensure:
- consistent cutting quality
- fewer interruptions during mowing
- smoother navigation
- longer component lifespan
- more reliable charging performance
In most cases, prevention is not just easier—it is also significantly more cost-effective than dealing with repairs or replacements.
Winter Storage Guide for the Off-Season
When the mowing season ends, proper storage becomes just as important as regular maintenance during the year. Many long-term issues with the Husqvarna Automower 430X actually start during winter—not because the mower is used, but because it is stored incorrectly.
A few simple steps before and during the off-season can help ensure the mower starts smoothly when spring returns.
Why Winter Storage Matters More Than Most Owners Think
During winter, the mower is not actively running, but several risks still exist:
- battery degradation from improper charge levels
- moisture buildup leading to corrosion
- dirt and grass hardening over time
- temperature stress on internal components
Even if the mower worked perfectly during the season, poor storage can cause performance issues the following spring.
Step 1: Clean the Mower Thoroughly Before Storage
Before putting the mower away, a full cleaning is essential.
Focus on:
- removing all grass buildup under the deck
- cleaning front caster wheels and wheel axles
- wiping down the exterior housing
- cleaning charging contacts on both mower and station
The goal is to avoid leaving organic material or moisture trapped inside the mower for months.
Even small amounts of wet grass can harden over time and become difficult to remove later.
Step 2: Inspect and Replace Worn Parts
Winter is the ideal time to check components that often get overlooked during the season.
Pay attention to:
- dull or bent blades
- heavily worn screws or blade mounts
- dirty or corroded charging contacts
- wheel buildup or damage
Replacing blades before storage is often a smart choice, so the mower is ready to perform immediately in spring.
Step 3: Battery Storage Best Practices
Battery care during winter is one of the most important factors for long-term performance.
General best practices include:
- avoid storing the mower with a completely empty battery
- avoid leaving it fully charged for extended periods
- aim for a moderate charge level before storage
- keep the mower in a stable, dry environment
Extreme cold or prolonged inactivity at improper charge levels can gradually reduce battery capacity over time.
Step 4: Choose the Right Storage Location
Where you store the mower matters just as much as how you prepare it.
Ideal storage conditions:
- dry indoor environment (garage, shed, utility room)
- stable temperature (avoid freezing conditions if possible)
- protected from moisture and direct sunlight
- away from heavy dust or chemicals
Avoid leaving the mower outdoors, even if it is covered. Moisture and temperature changes can still affect internal components.
Step 5: Protect the Charging Station and Cables
The charging station also needs attention during the off-season.
Depending on your setup:
- clean the station contacts
- check for grass or soil buildup around the base
- protect or store the power supply if recommended
- ensure cables are not exposed to heavy winter conditions
Keeping the charging system in good condition helps prevent spring startup issues.
Spring Restart Preparation
When the new season begins, a quick inspection helps ensure everything is working properly.
Before restarting:
- check battery charge level
- inspect blades and replace if needed
- clean dust or storage residue
- test docking and charging function
- verify wheel movement is smooth
Most issues after winter are not failures—they are simply results of small maintenance steps being skipped before storage.
A Simple Rule for Winter Care
A good way to think about winter storage is:
“What you do before storage determines how easily the mower starts next season.”
A little preparation in the fall can save a lot of troubleshooting in the spring, and helps ensure the mower continues performing reliably year after year.
Helpful Accessories and Replacement Parts
Keeping the Husqvarna Automower 430X in good condition is much easier when you have the right accessories on hand. While most maintenance tasks are simple, having a few basic replacement parts ready can save time and help avoid downtime during the mowing season.
This section focuses on practical, commonly used items that support everyday maintenance—not complex upgrades or unnecessary add-ons.
Replacement Blades (Most Important Consumable)
Blades are the most frequently replaced part of any robotic mower, and the 430X is no exception.
Why they matter:
- directly affect cutting quality
- influence battery efficiency
- impact lawn appearance
Over time, blades naturally become dull or slightly chipped, especially if the lawn contains sand, twigs, or thick grass.
It’s a good idea to always keep a small запас of spare blades so replacements can be done quickly when needed.
Cleaning Brushes and Tools
Simple cleaning tools make routine maintenance much faster and more effective.
Useful options include:
- soft-bristle brushes for removing grass buildup
- small detailing brushes for wheel areas
- microfiber cloths for wiping surfaces
- plastic scrapers for stubborn debris (non-metal only)
These tools help prevent damage while keeping the mower clean without overcomplicating the process.
Wheel Cleaning Accessories
The front and rear wheels tend to collect debris more easily than most owners expect.
Helpful items include:
- narrow brushes for wheel axles
- compressed air (for dry debris removal)
- small picks for removing tangled grass or stringy weeds
Keeping wheels clean improves traction and reduces the chance of the mower getting stuck.
Charging Station Maintenance Items
Charging issues are often caused by simple dirt or poor contact rather than actual system failure.
Useful items include:
- dry microfiber cloths for contact cleaning
- electronic contact cleaner (light use only)
- small brush for removing dust around the docking area
Regular cleaning of both mower and station contacts helps maintain stable charging performance.
Boundary Wire Repair Kit (Optional but Useful)
For users with wired setups, a boundary wire repair kit can be extremely helpful.
It typically includes:
- wire connectors
- repair couplers
- small stakes or markers
This is especially useful if the cable gets accidentally cut during gardening or seasonal lawn work.
Protective Garage or Cover
A protective cover or mower garage helps shield the mower from:
- direct sunlight
- heavy rain
- falling debris like leaves or branches
While the mower is built for outdoor use, reducing long-term exposure to harsh weather conditions can help maintain its exterior and reduce unnecessary wear.
Why Accessories Actually Matter
Many owners overlook accessories and focus only on the mower itself. However, simple tools and spare parts often make maintenance:
- faster
- easier
- more consistent
- less stressful during peak season
In practice, having the right accessories available often determines whether maintenance becomes a quick 5-minute routine—or something that gets delayed and eventually forgotten.
A Practical Approach to Buying Accessories
You don’t need everything at once. A simple strategy is:
Start with blades and basic cleaning tools, then add other items based on real usage.
This keeps maintenance practical and avoids unnecessary purchases while still ensuring the mower stays in good working condition throughout the year.
Common Maintenance Mistakes New Owners Make
Most performance issues with the Husqvarna Automower 430X are not caused by design flaws or mechanical failure. In reality, they are often the result of small maintenance mistakes that build up over time.
New owners usually don’t realize these habits matter until they start seeing symptoms like uneven cutting, docking issues, or frequent interruptions.
Below are the most common mistakes—and how to avoid them.
Waiting Too Long to Replace Blades
One of the most frequent mistakes is using blades far beyond their effective lifespan.
Many owners think:
“If it’s still cutting, it’s fine.”
But dull blades don’t stop working—they just start cutting poorly.
This leads to:
- torn or frayed grass tips
- uneven lawn appearance
- higher energy consumption
- extra strain on the mower
A better approach is to replace blades as soon as cutting quality starts to decline, not when the mower completely fails to cut.
Ignoring Grass Buildup Under the Deck
The underside of the mower is one of the most important maintenance areas, but also the most commonly ignored.
Over time, wet grass can:
- harden into compact layers
- trap moisture under the deck
- affect blade rotation efficiency
- reduce overall cutting performance
Many new owners only clean the top surface of the mower, assuming that is enough. In reality, most performance issues start underneath.
Using High-Pressure Water for Cleaning
It may seem convenient, but using a pressure washer is one of the fastest ways to create long-term problems.
High-pressure water can:
- push moisture into sensitive components
- damage seals and bearings
- increase risk of corrosion over time
For routine maintenance, a soft brush or damp cloth is usually more than enough.
Neglecting Charging Contacts
Charging issues are often misdiagnosed as battery failure, when the real problem is much simpler.
Dirty or oxidized charging contacts can lead to:
- inconsistent charging
- docking failures
- reduced mowing time
A quick wipe during regular maintenance prevents most of these issues.
Storing the Mower Incorrectly in Winter
Winter storage mistakes are another common issue, especially for first-time owners.
Typical mistakes include:
- leaving the mower outdoors without protection
- storing it with a completely empty battery
- ignoring cleaning before storage
- exposing it to damp or freezing conditions
These habits often lead to spring startup problems that are completely avoidable.
Not Following a Simple Maintenance Routine
Many owners overcomplicate maintenance or assume it requires a lot of time.
As a result, they either:
- do nothing until problems appear
- or try deep cleaning too infrequently
In reality, most issues can be prevented with a simple 5-minute weekly routine.
The Core Pattern Behind Most Mistakes
When looking at all these issues together, a clear pattern emerges:
Most problems are caused by small, repeated neglect—not sudden failure.
Blade wear, grass buildup, and dirty contacts develop slowly. Because of that, they are easy to miss until performance noticeably drops.
A Simple Rule to Avoid Most Problems
A practical mindset many experienced owners follow is:
“Small, regular maintenance prevents big, expensive problems.”
Keeping maintenance simple, consistent, and frequent is far more effective than trying to fix issues after they appear.
Final Thoughts
Owning a Husqvarna Automower 430X is less about complex maintenance and more about consistent small habits. Most performance issues do not appear suddenly—they develop slowly over time when simple tasks like cleaning, blade replacement, and basic inspections are ignored.
The good news is that keeping the mower in good condition does not require technical experience or a lot of time. In most cases, just a few minutes each week is enough to prevent the majority of common problems such as uneven cutting, docking issues, or reduced traction.
If there is one key idea to take away from this guide, it is this:
Regular, simple maintenance is far more effective than occasional deep cleaning or reactive repairs.
By following a light but consistent routine—cleaning grass buildup, replacing blades when needed, keeping charging contacts clean, and storing the mower properly during winter—you can significantly extend both performance and lifespan.
Instead of thinking of maintenance as a task, it helps to think of it as a small habit that protects your mower throughout the entire season.
In the end, a well-maintained 430X not only performs better, but also saves you time, reduces frustration, and keeps your lawn looking consistently clean with very little effort.